
How to Effectively Manage Product Data on a Drupal Website for Manufacturers?
A manufacturing company's website is often the place where a lot of detailed product information is located. Efficiently managing this data can be a challenge, especially with a large amount of product assortment and technical information. In this article, I'll show you how Drupal - an advanced CMS - enables you to conveniently manage and present your products on your website. I encourage you to read the article or watch the video in the “Nowoczesny Drupal” series.
Product data management in Drupal
In a previous article based on an episode of the “Nowoczesny Drupal” series, I presented how to quickly create a website for the manufacturing industry using Droopler. I described the process of creating landing pages and the mechanism for adding and displaying a product. This time I’ll show how such a website can be further developed to present your product offerings even better.
Drupal allows you to create dedicated data fields for products. This can be done using the "content types" and "field management" functions. Here's how it works:
Adding product data fields
Let's expand the page from the above-mentioned article. The data I presented then was in the form of a table. It's a very simple solution, but it contains drawbacks such as the lack of search, filtering, clear display or listing capabilities since they’re simple text fields.
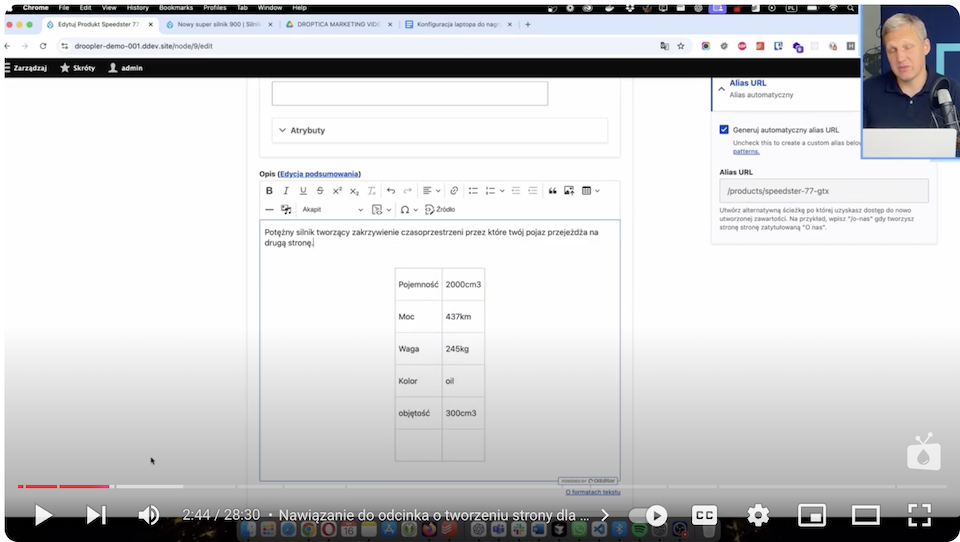
You can extract this data into separate elements, making them filterable and searchable. As a result, they’ll be more easily accessible to administrators and customers.
To extract these fields, you need to perform several steps.
1. Go to content structure management
- In Drupal's administrative menu, choose "Structure."
- Next, go to "Content Types."
- From the list of available content types, select "Product" and click "Manage fields."
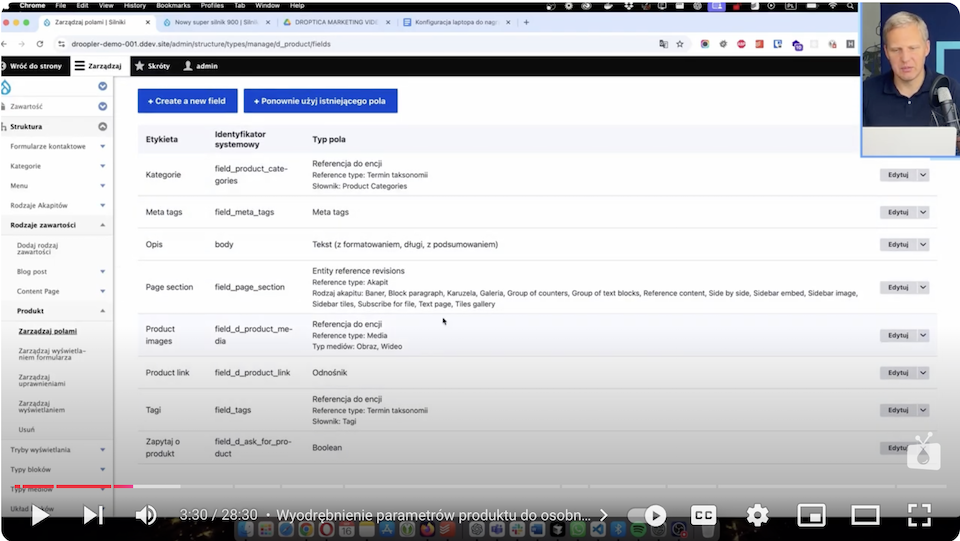
2. Add a new field for the product
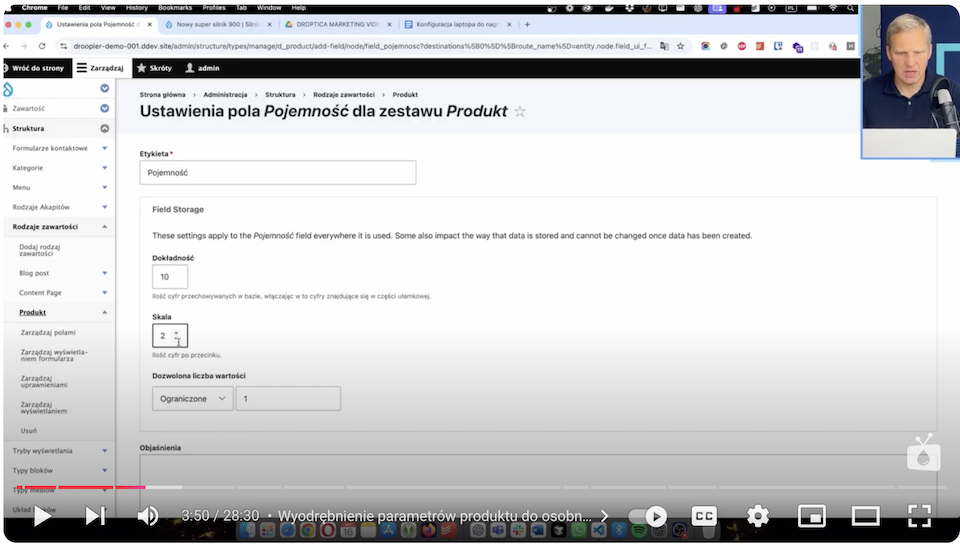
Example 1: "Capacity" field (decimal number)
- Click "Add Field."
- Choose the field type "Number (decimal)."
- Call the field, for example, "Capacity."
- Configure settings:
- Scale: choose how many decimal places to display (e.g., one place).
- Minimum/maximum values: you can set them optionally (e.g., the minimum is 0).
- Unit of measurement: set a prefix or suffix, such as "cm³" for capacity.
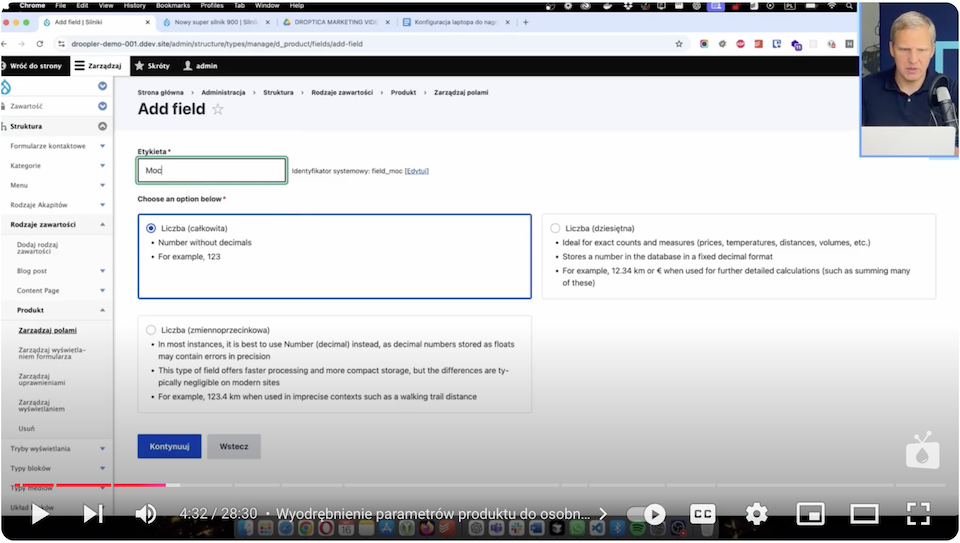
Example 2: "Power" field (integer number)
- Click "Add Field."
- Choose the field type "Number (integer)".
- Call the field, for example, "Power."
- Configure settings:
- Unit of measurement: add a suffix, such as "KM" (horsepower).
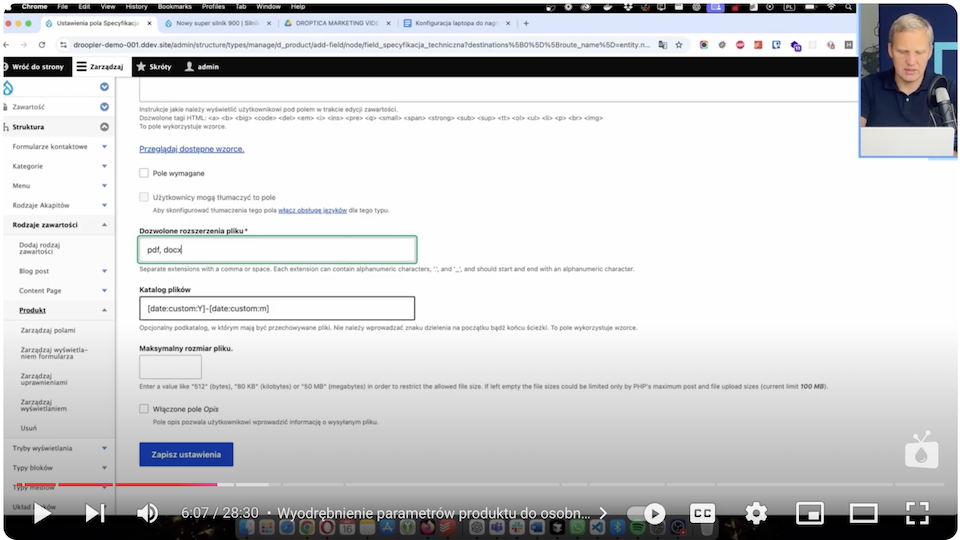
Example 3: "Technical specification" field (file)
- Click "Add Field."
- Select the "File" field type.
- Name the field, for example, "Technical specification".
- Configure settings:
- File type: decide what types of files can be uploaded, such as PDF (enter pdf in the extensions field).
- Description: enable the description field so that the administrator can add a comment to the attached file.
3. Save and configure the display of the form
Once the fields are added, they need to be properly organized in the form so that it’s convenient to read or edit them. To do this, you need to:
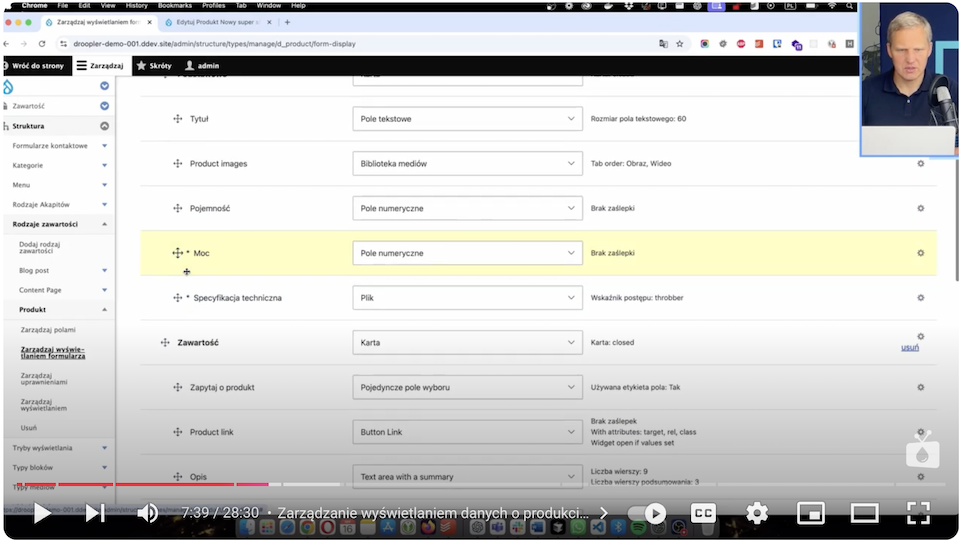
- Go to the "Manage form display" tab.
- Set the order of the fields according to our preferences, such as:
- the "Capacity" field above the "Power" field.
- the "Technical Specifications" field at the end.
- Save the changes.
- Go to the "Display management" tab.
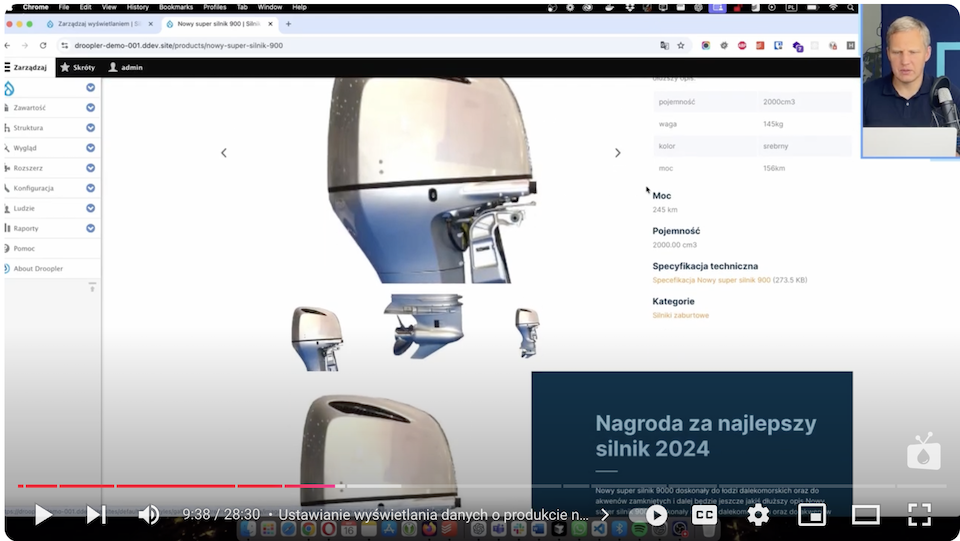
- Adjust the method of presentation:
- Set the field labels to be displayed above the values.
- For the "Technical specification" field, choose to display as a link to the file.
- Save the configuration.
5. Test the changes made
- Go to edit any product.
- Check that the new fields (e.g., capacity, power, technical specifications) are available in the form.
- Fill in the test data and see how it displays on the product page.
Creating views for product data in Drupal
Drupal allows you to build views - dynamic lists of products. Views can be presented in the form of:
- Technical data tables.
- Graphic grid with images of products.
- Administration pages for product management.
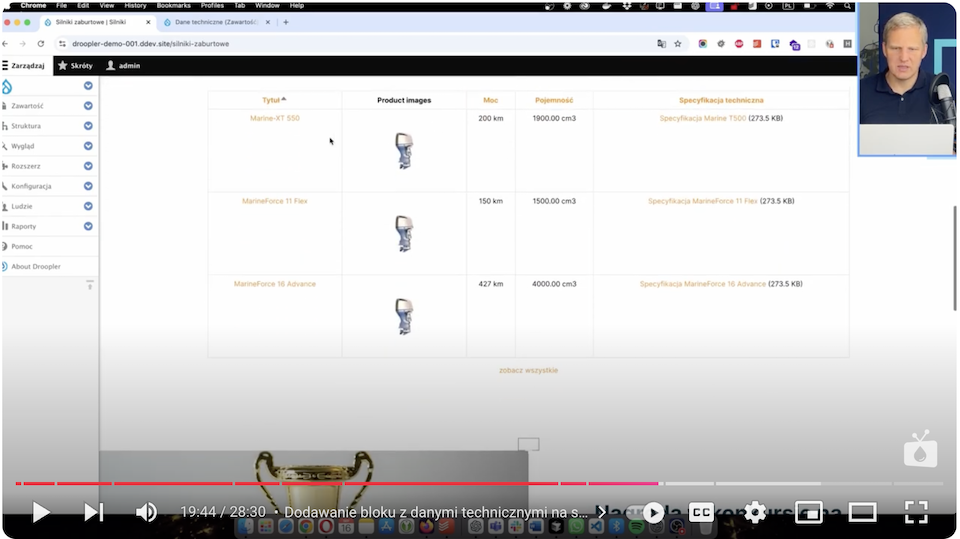
1. End-user views
An example view for customers might include:
- Product photo.
- Name, power, capacity, and link to download technical specifications.
- Option to sort data, such as by power or capacity.
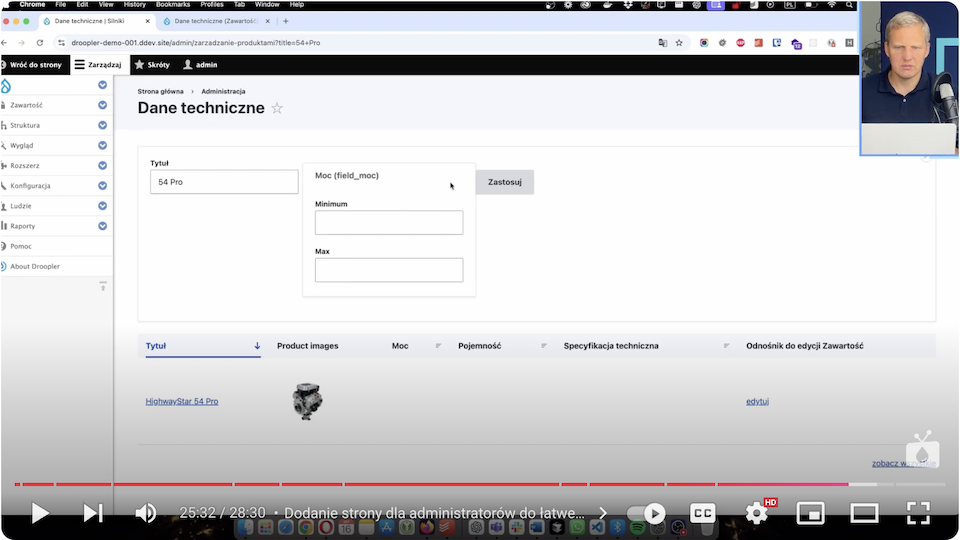
2. Administrative views
Administrators can use a dedicated view that allows:
- Search for products by title or other parameters, such as power.
- Edit products directly from the view.
- Use filters to limit the list of products to specific categories or ranges of data.
How to build views with technical data in Drupal?
Now, I’ll demonstrate how to easily build a convenient view with data.
1. Create a view
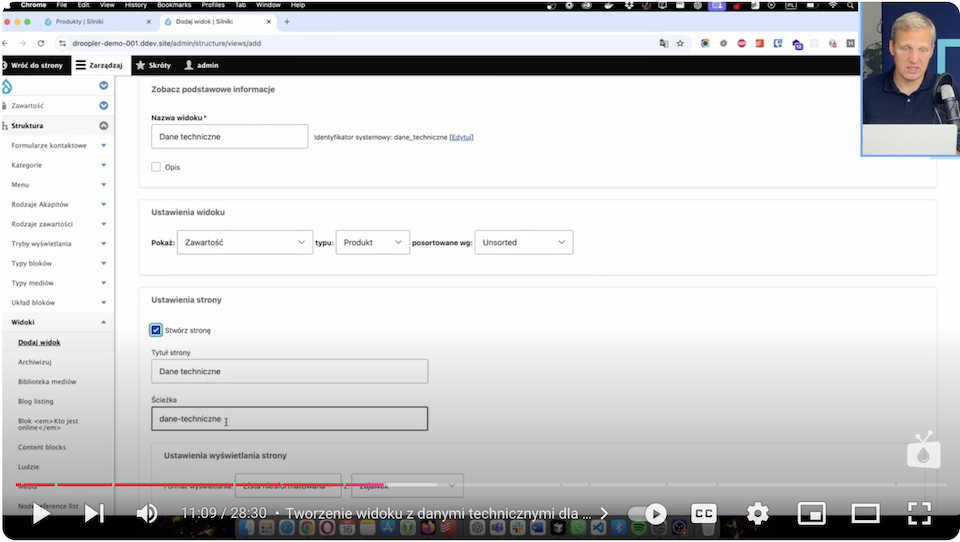
- Go to "Structure" → "Views" and click "Add new view."
- Give the view a name, such as "Technical data," select the content type "Product" and the display format "Table."
- Set the page’s URL, such as /data-technical, and the number of elements per page, such as 10.
2. Add fields to the table
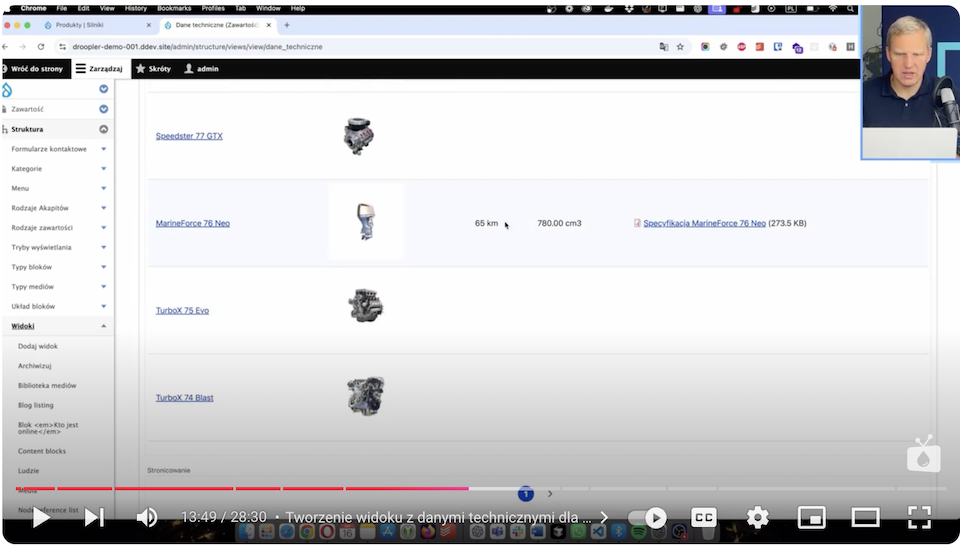
- Add fields:
- Title - default field for the product name.
- Photo - in thumbnail format.
- Power and Capacity - numerical fields.
- Technical specification - as a link to the PDF file.
- Determine the order and labels of the fields in the table.
3. Filters and sorting
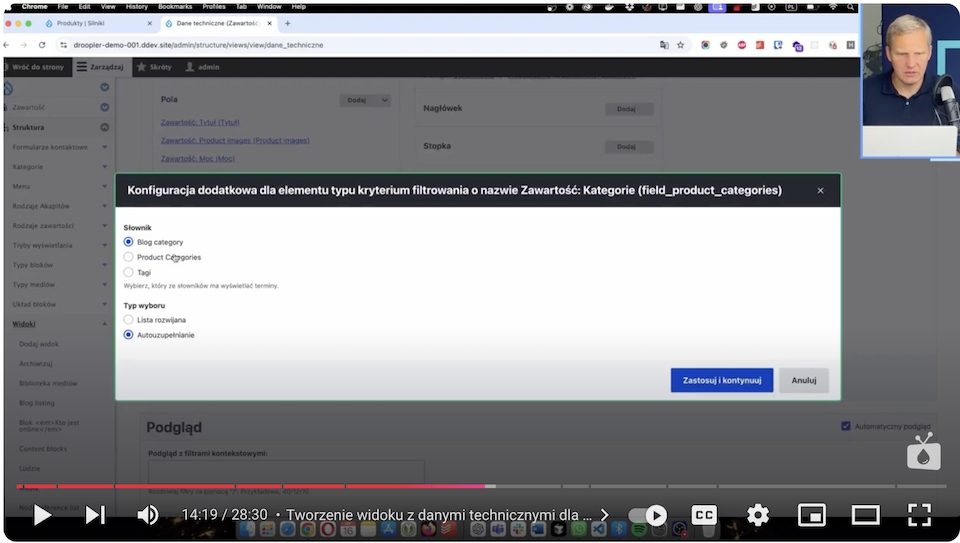
- Add filters, such as limiting the view to the "Outboard motors" category.
- Enable sorting of the data in the table, such as by title, power, or capacity.
- Allow users to click on the table headers to sort the data themselves.
4. Pagination and saving the view
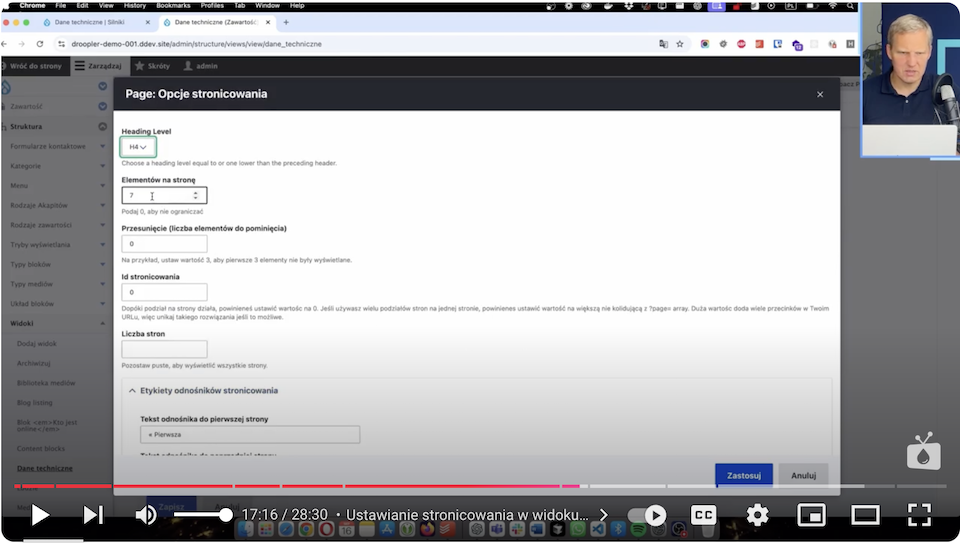
- Enable pagination, such as seven items per page, to clarify the view.
- Save the view and test it in the preview.
5. Optional: view in block
- Create a block using this view.
- Limit the number of elements in the block, for example, to three, and add a "See more" link leading to the view's main page.
6. Testing
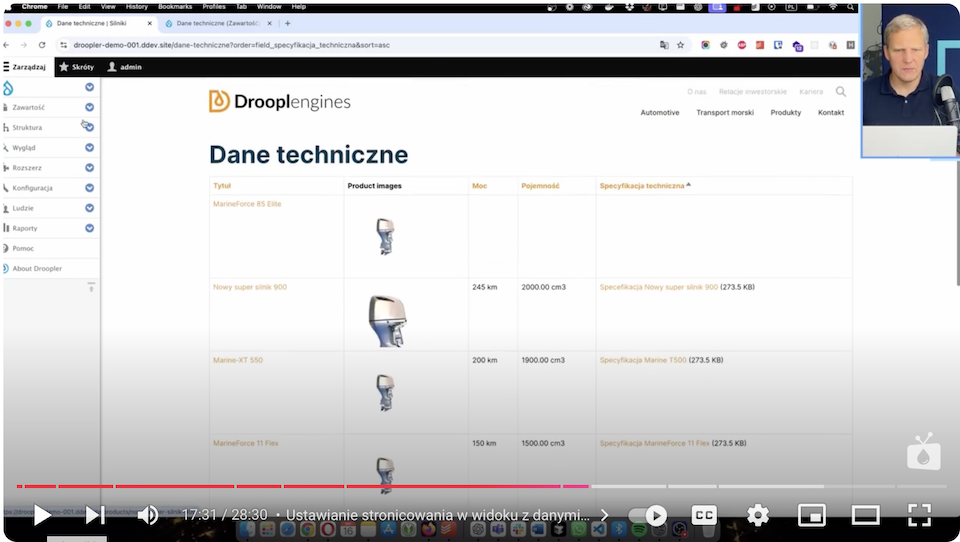
- Go to the /data-technical page and check that the fields display correctly.
- Test filters, sorting, and pagination.
Integrating views with other page elements on Drupal
Drupal allows you to add views to blocks that can be placed on any subpage. For example:
- A block listing the latest products can appear on the home page.
- A block with the three most popular products can be added to the category page.
Adding a page for administrators to easily manage product data
An administrative page in Drupal allows quick browsing, editing, and filtering of products, significantly simplifying the management of large data sets. Below, I explain step-by-step how to create such a page.
1. Create an administrative view
- Go to "Structure" → "Views" and click "Add new view."
- Give a name, such as "Product Management," and select the content type "Product".
- Specify the URL path, such as admin/management-products, and set the format as "Table."
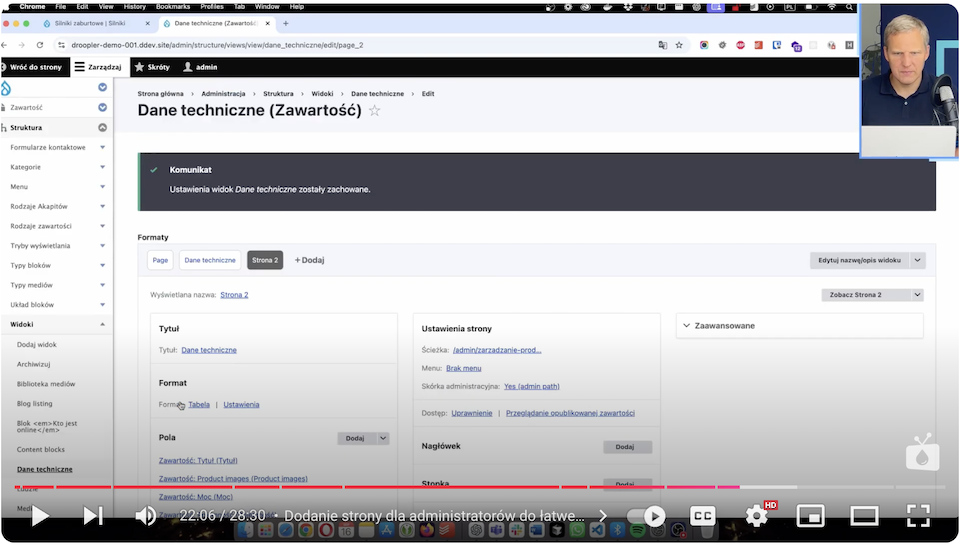
2. Add fields
- Put fields in the table:
- Title - Product Name.
- Power and Capacity - Technical Data.
- Technical specification - link to PDF file.
- Add an "Edit Link" field to allow you to go to edit the product quickly.
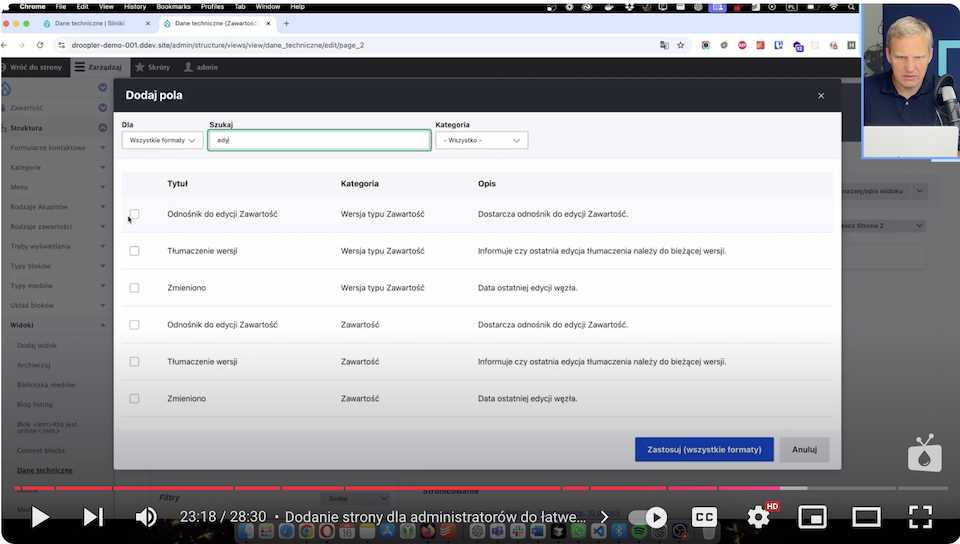
3. Configure filters
Now, you can add filters to make it easier to search for products. For example, this could be a "Title" filter to search by name or a "Power" filter with an option to search within a preset range.
Streamlining the company's product management
Drupal offers many additional features that support the management of an extensive product base:
- Filtering and searching - the ability to search for products using any data, such as power or capacity.
- REST API - data can be exposed using REST API for mobile applications or other systems.
- Data centralization - all information is stored in one place and automatically updated on all views.
Managing product data on Drupal - summary
Drupal is an extremely flexible system that works well for product management. With features such as dedicated data fields, dynamic views, and advanced filtering capabilities, you can easily organize an extensive database of products and make information easily accessible to both customers and administrators.
If you're looking for a solution to effectively manage your product data and facilitate the presentation of your offerings, Drupal may be the perfect choice. Contact us to learn how to customize this system for your needs or build a manufacturing website from scratch.


