
How to Integrate Drupal with LDAP? A Comprehensive Step-by-Step Guide
In this article, I’ll demonstrate how to integrate Drupal with a Lightweight Directory Access Protocol (LDAP) server, using JumpCloud as an example. With this guide, you’ll be able to quickly and securely manage users on your website. I encourage you to read the blog post or watch the video in the “Nowoczesny Drupal” series.
Introduction to user management
Managing users across systems and applications is becoming increasingly challenging in modern IT environments, especially in large companies and organizations. As the number of users grows, administrators often have to update each person's data in multiple places. This approach can not only be time-consuming but also increases the risk of errors and inconsistencies in information.
In addition, any change in position or personal information means that profiles in all systems have to be manually updated, which can be very difficult to keep up to date. To simplify user data management, many organizations choose to implement central directories that store information about users and their permissions.
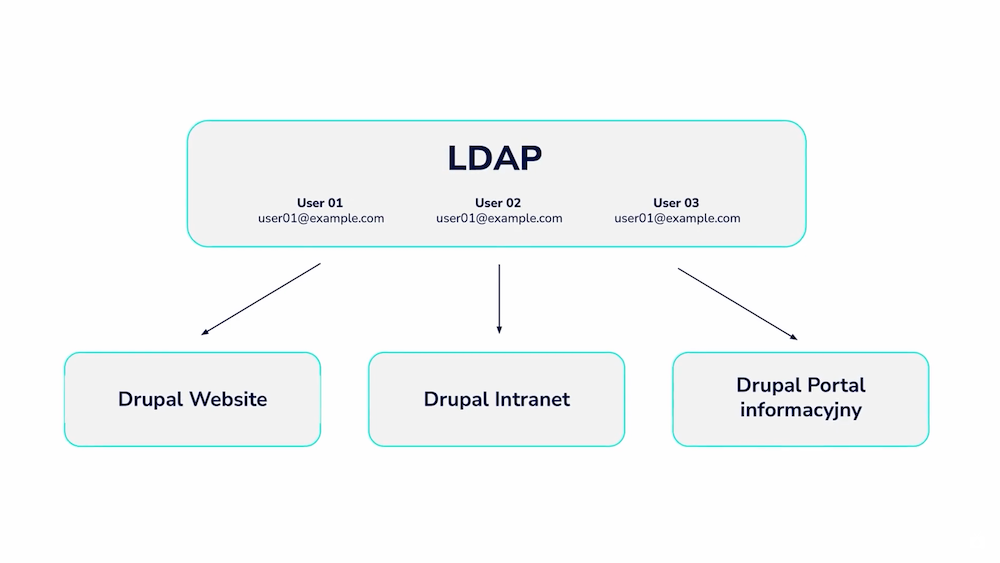
Drupal, as a willingly chosen CMS, is great for integrating with such directories, as it allows using a single main point for user management, making administrators' work easier. By integrating with an LDAP server, Drupal enables users to log in to multiple systems using a single set of credentials.
Later in this article, you’ll see how to integrate Drupal with an LDAP server to enable single sign-on (SSO) and central user management using JumpCloud as an example. Similarly, you can replicate this for another LDAP server, such as Microsoft Entra or OpenLDAP.
Where is LDAP worth using, and who will find it helpful?
LDAP integration is particularly useful for organizations that employ large teams, have numerous IT systems, or need centralized user data management. LDAP is used in:
- Companies and corporations - which need a unified login system for multiple applications. With LDAP, employees can log in to various tools with a single account. In this case, such integration is most often carried out in intranet systems.
- News portals - employing multiple editors with different levels of authority. LDAP on CMSs for media and news publishers makes it possible to quickly update user data.
- Educational sector - in schools and universities, where you need to manage the data of many students, lecturers, and administrative staff. The central LDAP directory allows convenient granting of permissions, access to resources, and automatic synchronization of profiles.
- Government institutions - which operate on a lot of confidential data need a unified system to manage access to various systems and securely store user data.
By centralizing data, LDAP integration allows administrators to have better control over systems and offers users the convenience of Single Sign-On (SSO) and greater security.
How to prepare Drupal for LDAP integration?
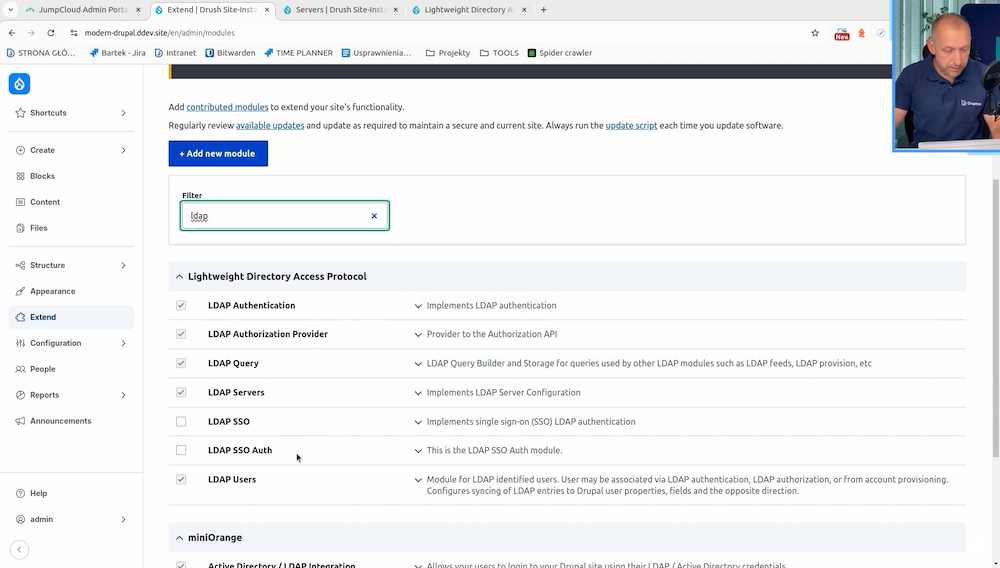
To set up such an integration, you’ll only need one module - Lightweight Directory Access Protocol (LDAP). This module offers several submodules, such as:
- LDAP Servers,
- LDAP Users,
- LDAP Query,
- LDAP Authorization.
These are necessary for configuring and synchronizing data with the LDAP server.

I already have this module installed, but you can see what it looks like on the module installation page:
Installation and activation of LDAP modules
- Install the LDAP module on the Drupal modules page.
- After installation, activate the necessary submodules, such as Authorization, Provider Query, Servers, and Users, which are required for full functionality of the integration.
Configuring the connection to the LDAP server
When setting up an LDAP server for Drupal, you'll need to enter essential information, such as the server address, port, and encryption settings. With JumpCloud and other popular LDAP servers, these details should be readily available.
In addition to the configuration itself, so that there is a connection to this server, I’ll show you how to integrate data from the server for individual users and how to enter this data into Drupal for the user.
Configuring the LDAP server in Drupal
- Go to the "Configuration" > "People" > "LDAP" tab.
- Select the "Servers" tab and configure the server settings. For JumpCloud, you'll need to enter port and encryption details.
- After entering the server data, you can test the connection to make sure all the information is correct. To do this, go to the "Test" option. There, you can select the user whose connection you want to test.
- Continue to the panel for managing users, permissions, and their data.
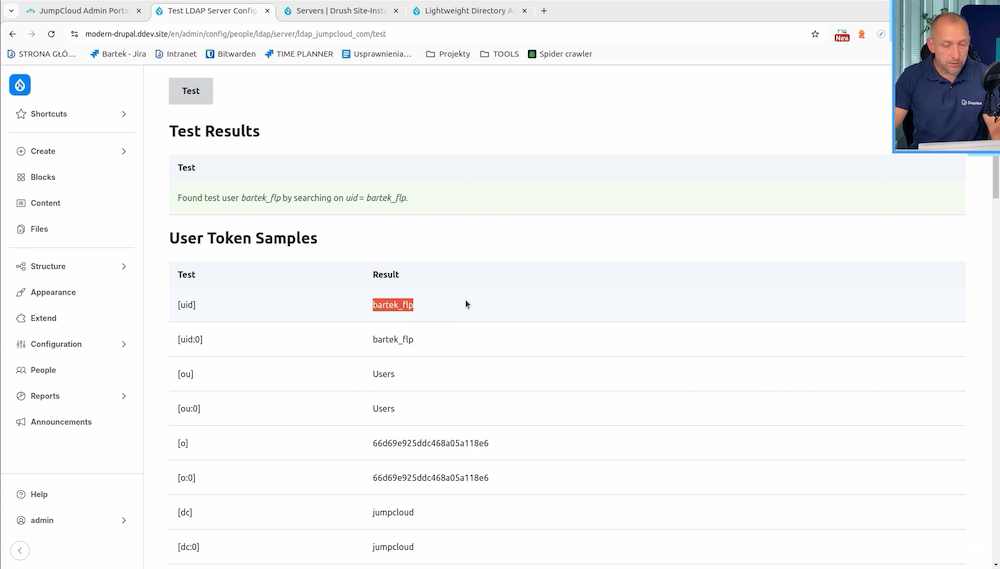
The test on the user example came out positive. In green, you can see FoundTestUser, which means this connection is good. As it’s established with the connection to the LDAP server, several different data will be able to be used later in field mapping or other data already in Drupal itself.
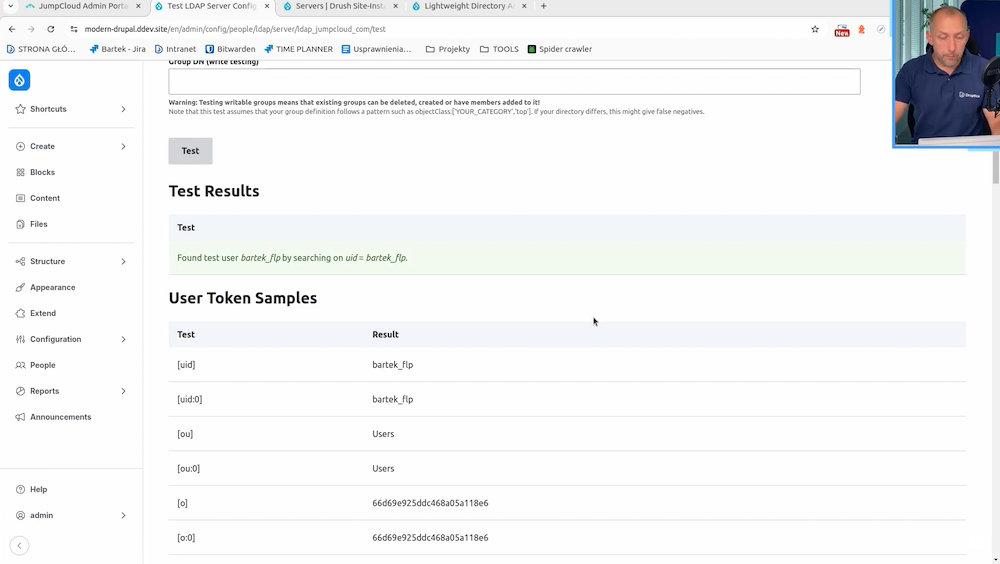
In the table on the left, you can see the token that is used, and next to it’s given the value of that particular token:
Synchronizing user data from the LDAP server to Drupal
Let's move on to Drupal's integration with LDAP, which allows you to automatically retrieve user data from the server and assign it to the corresponding fields in Drupal. This process can be configured by mapping fields from the LDAP server to fields in Drupal.
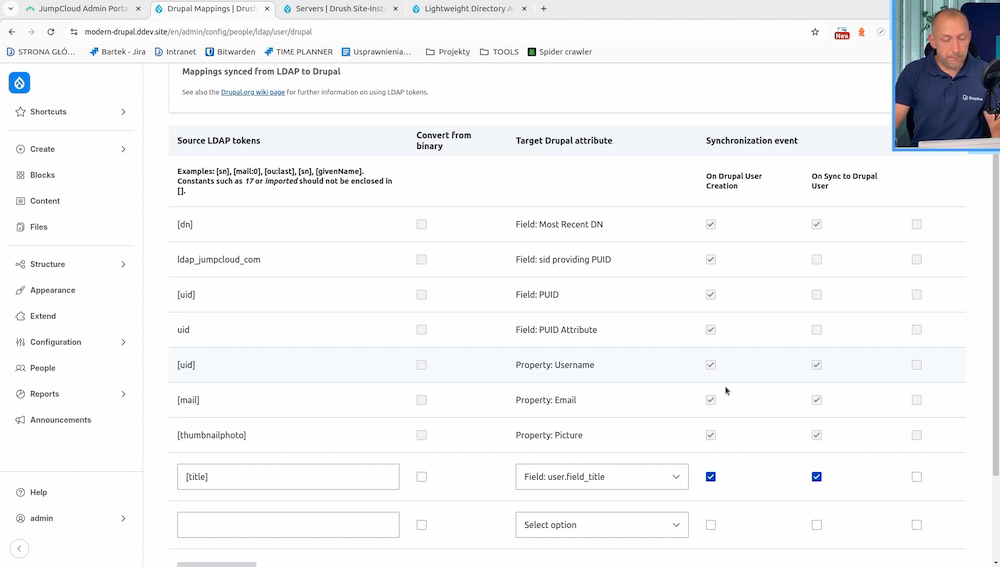
We have a working connection and mapping fields set up.
Mapping of user fields
- Go to the LDAP configuration in Drupal: To get started, go to "Configuration" > "People" > "LDAP." Here, you’ll have access to the user data mapping settings.
- Select the field mapping tab: In the LDAP tab, you’ll find the ability to assign fields from the LDAP server to Drupal user fields. Here, you can define which fields from LDAP should correspond to specific user fields in Drupal.
- Mapping basic fields:
- Start by defining basic fields, such as username, email, and picture. For example, you can assign the username field from the LDAP server to the username field in Drupal, so that when the user logs in, the data will be automatically synchronized.
- In addition, you can set up synchronization for email and picture fields if they’re available in the LDAP directory.
Logging in to Drupal after LDAP integration
Once Drupal's integration with the LDAP server is complete, logging in is straightforward if all the LDAP server data has been properly configured and mapped. So, let's proceed to log in after the mapping fields will be completed.
As you can see, I logged in here with my username and password. Here, it’s the title "Drupal Developer." This is data that was just downloaded from JumpCloud.
We know that the integration works and will probably work for the rest of the users. So we can map another field. For example, let's check what fields still exist in "user" just in this LDAP directory. So, we go to "details" and see Employee Type - b2b. Let's assume that this is the data we’d like to have in our Drupal user.
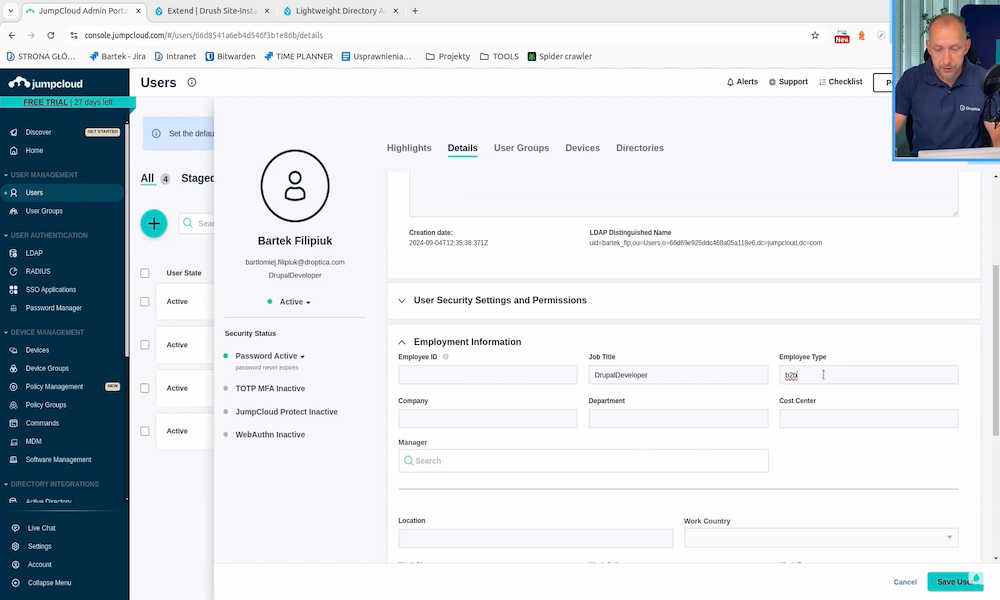
To do this, we need to create a new field in "user."
Adding custom fields to users in Drupal
If the data in LDAP is more extensive and you want to import additional user information, you can add new fields in Drupal and configure their mapping with the data from the LDAP server.
Creating new fields for data from LDAP
- Go to "Configuration" > "People" > "Account settings" and select "Manage fields."
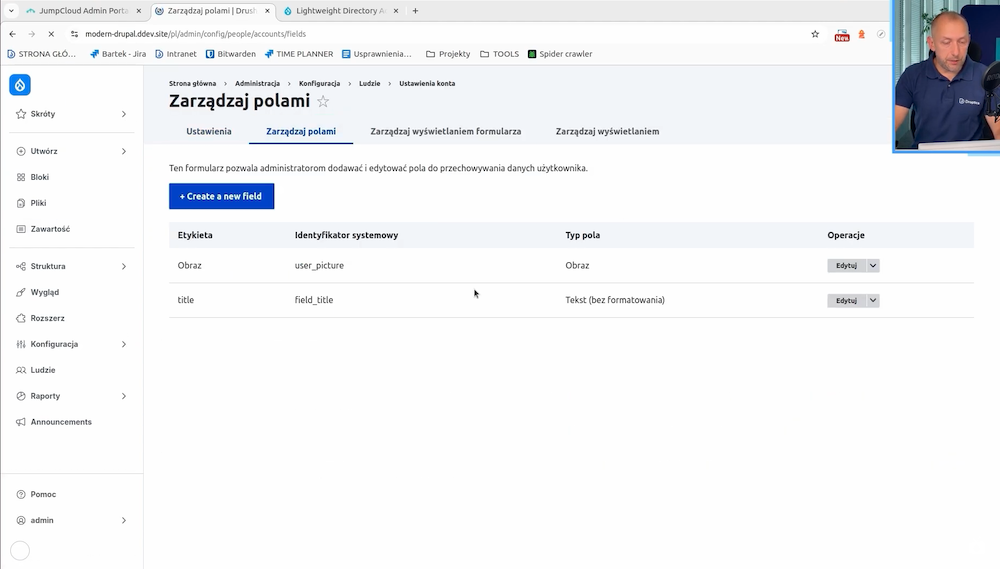
- Add a new field: "clear text" and name it: employee type. Moving on, save the changes.
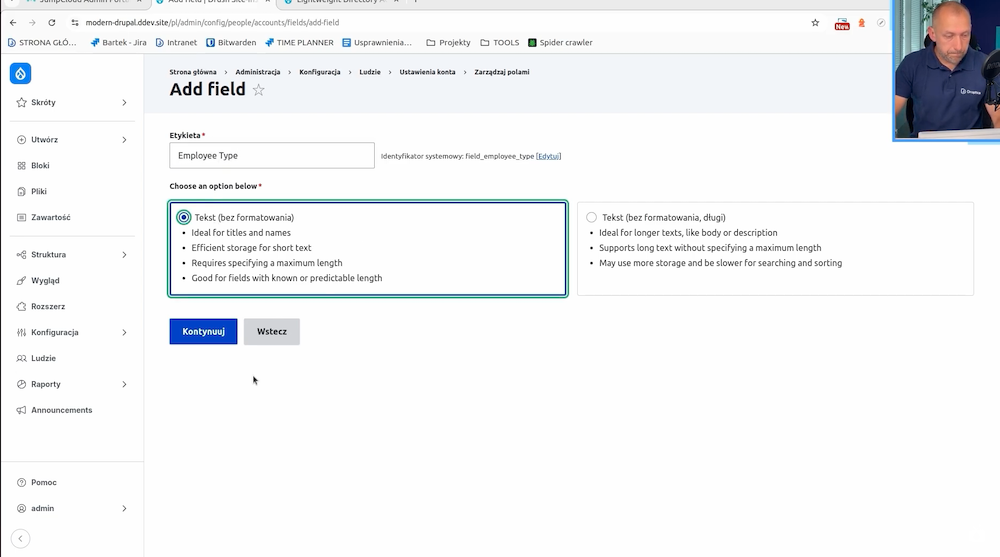
Here, you can see that the field is created:

- Go to the LDAP settings in Drupal: After creating a new field, go to "Configuration" > "People" > "LDAP."
- Field mapping from LDAP: Select the "Servers" or "Users" section, where you can manage field mapping. Find the option to map Drupal fields with corresponding fields on the LDAP server.
- Enter token from LDAP: Enter a token from the LDAP server that corresponds to a new field, such as employee type. You can preview the tokens in the LDAP server testing tab.
- Save settings: After assigning a token to a new field in Drupal, save the changes.
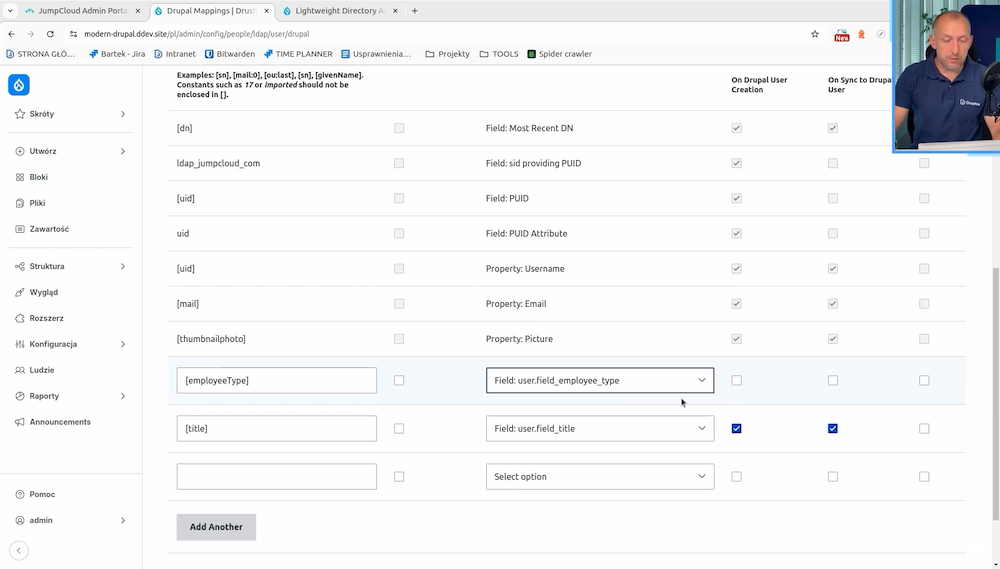
Testing user synchronization and login
Once the setup is complete, you can test that the integration is working properly. Log in to Drupal with an account from JumpCloud or another LDAP server and check that all data is properly synced.
Verification of integration performance
- Log out of Drupal and log in again using the user's LDAP credentials.
- Verify that user fields such as username, email, job title, and other custom fields have been synchronized correctly.
- If there are synchronization errors, make sure field mapping and synchronization are set correctly.
Managing data synchronization and updates
When configuring field mapping, you can decide when the data should be updated: when you create a new account or synchronize every time. This gives you control over the process of updating user data in Drupal.
Configuration of synchronization events
- Select the appropriate synchronization options in the LDAP settings to ensure that data is updated every time a user logs in.
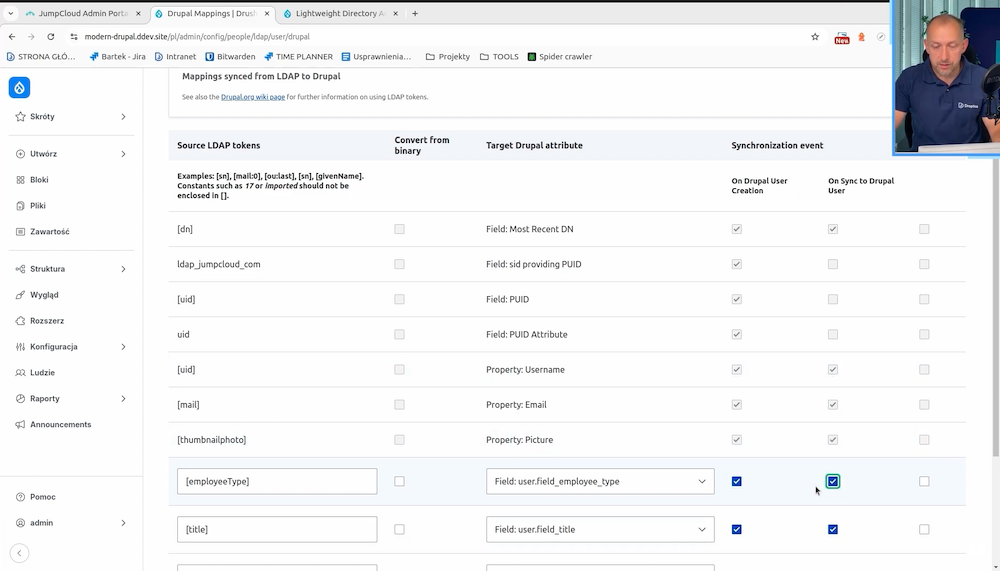
- On the other hand, for new fields, make sure they are assigned to synchronization events for both new accounts and existing users.
After proper synchronization and login, we should see the selected fields.
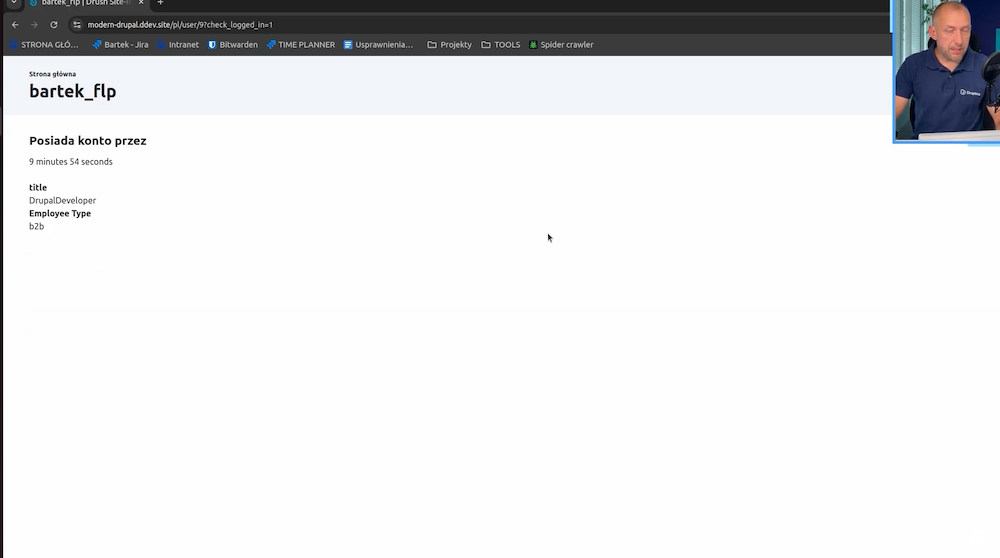
Synchronization and logging work. Also, as you can see, configuring Drupal's connection to the server itself with an LDAP-based user directory is not difficult.
All it requires is having an LDAP server and proper configuration, which can be the longest process in creating this integration.
Integrating Drupal with LDAP - summary
Drupal's integration with an LDAP server, such as JumpCloud, enables efficient user data management in one central location. With field mapping and automatic synchronization, administrators can simplify the process of logging in and managing user data, saving time and reducing the risk of errors. Drupal's configuration of LDAP is relatively simple, and its flexibility allows it to adapt to different LDAP systems.
With LDAP integration, Drupal has become a powerful tool for user management, especially useful for large organizations and portals with many editors. We encourage you to implement the above steps to improve your user management and administration efficiency in Drupal. If you encounter any problems or simply need advice, our Drupal agency experts will be happy to help.


