
How to Manage Roles and Permissions in Drupal? A Guide for Website Administrators

Who can add, edit, and delete content on your website? How do you make the "price" field accessible to distributors rather than regular users? In this blog post, I'll explain in detail how roles and permissions work in Drupal, what capabilities they offer, and how you can customize them for your website. I invite you to read the article or watch an episode of the “Nowoczesny Drupal” series.
What are roles and permissions in Drupal?
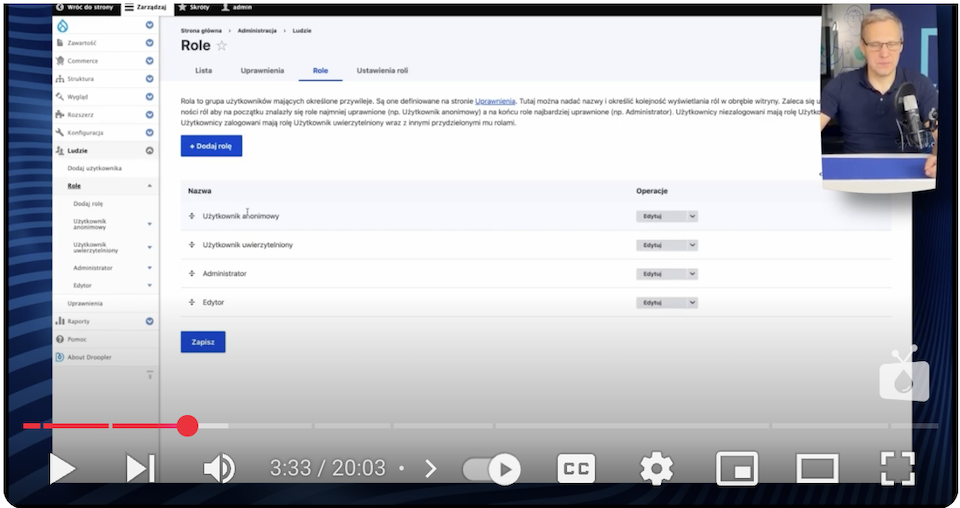
Roles in Drupal are groups of permissions that can be assigned to users. Each role determines what actions a user can perform on the website. By default, you have three fundamental roles available to you after installing Drupal:
- Anonymous user - a person who visits the web page without logging in.
- Authenticated user - a person logged into their account.
- Administrator - a user with full access to all website functions.
In addition, there is a special user with ID 1 in the system—the so-called super administrator. This is the first person to set up the website and has unlimited privileges, regardless of the assigned roles.
If you want to learn more about this topic from a developer's perspective, read our technical article on users, roles, and permissions in Drupal.
How does role management work in Drupal?
Each role in Drupal is a set of permissions. You can create new roles, such as "Editor," "Moderator," or "Distributor," and then assign them the appropriate permissions. Importantly:
- A user can have multiple roles assigned at the same time.
- Each additional role increases the scope of the user's privileges and never limits them.
For example, if a user has the "Editor" and "Moderator" roles, they have permissions from both roles.
Practical examples of roles and permissions
To better understand the mechanics of roles and permissions, take a look at a few scenarios:
- Restrict access to delete content: if you want editors to be able to add and edit products, but not to delete them, you can assign a role that excludes the "delete content" permission. This will avoid accidental deletion of important data.
- Access to unpublished content: only administrators can see unpublished entries by default in Drupal. However, using modules such as View Unpublished, you can grant editors the ability to edit and view all unpublished entries.
- Create closed zones on the website: you can configure the website so that only logged-in users will have access to certain content. An anonymous user trying to access these pages will see a "no access" message.
Managing permissions in Drupal
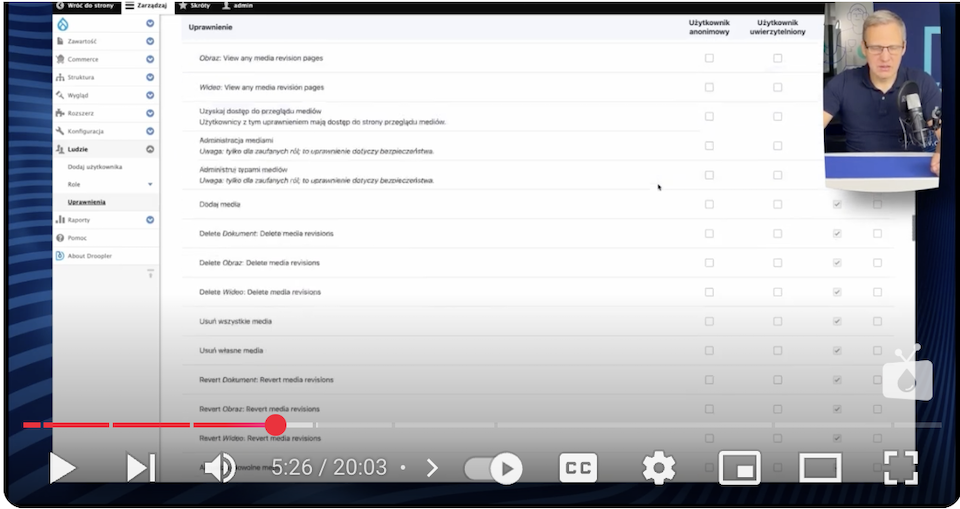
Permissions in Drupal are very detailed and allow you to specify precisely what users can do. Examples of permissions include:
- Creating, editing, and deleting content.
- Translation management.
- Viewing and editing specific fields in content forms.
In Drupal, each action is a separate permission, meaning the administrator has full control over who can do what on the website.
Extending functionality with modules
Drupal allows you to install modules that add new permissions or modify existing ones. Examples of modules include:
- Field Permissions - it allows you to manage the visibility of individual fields. For example, you can hide product prices from anonymous users and show them only to distributors.
- View Unpublished - permits selected roles to view and edit unpublished content.
- Private Files - authorizes only logged-in users or specific roles to access files.
Drupal also allows you to write your module to manage permissions in a particular user role in the desired way.
How to add a new user in Drupal?
Adding users in Drupal is a simple process that can be done in a few steps.
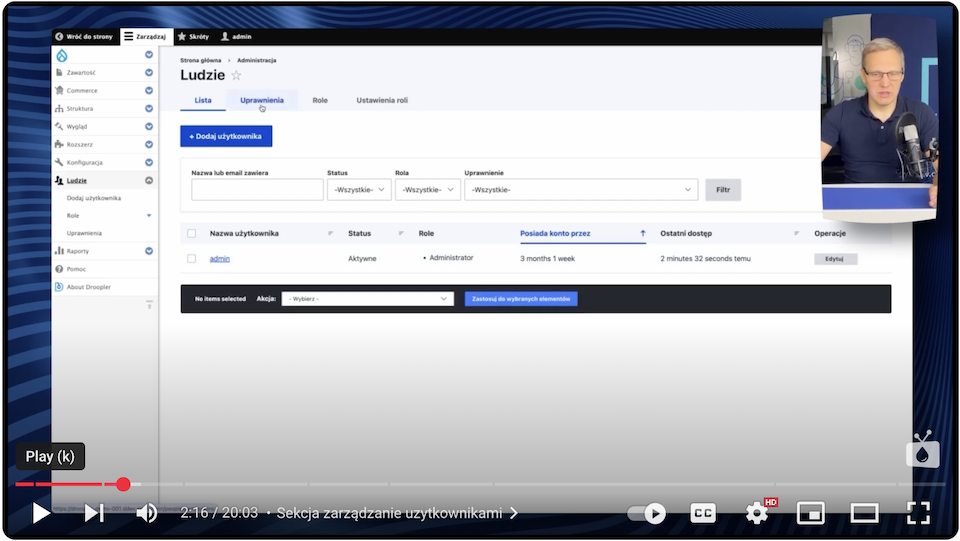
1. Go to the user management section
- Log in as an administrator to your website on Drupal.
- In the top administrative menu, click "Manage."
- Select the "People" tab - this is where you can find all the user management options.
2. Start the process of adding a user to Drupal
- In the "People" section, you’ll find the "Add User" button - click it.
- A form will open, where you’ll fill in the details of the new user.
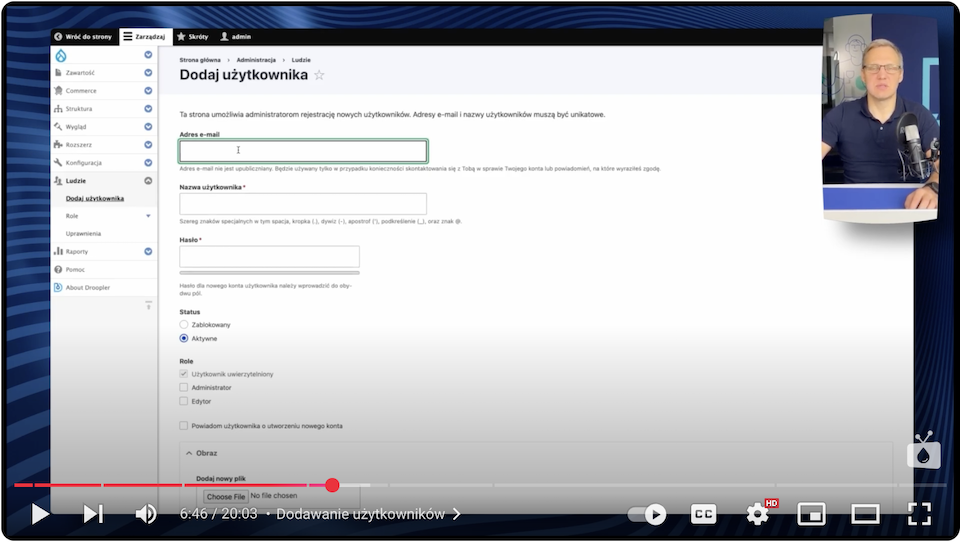
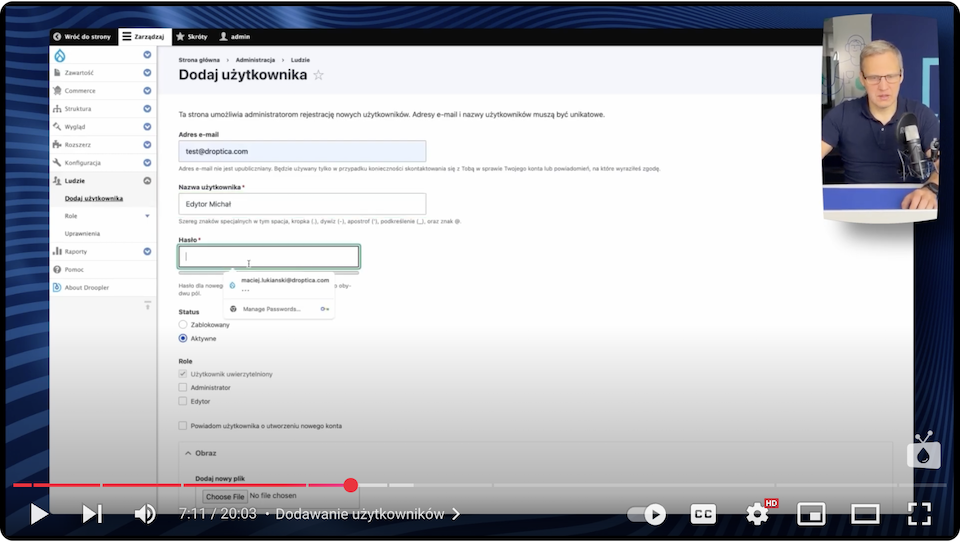
3. Fill in your user information
You must complete the following fields in the form:
- Username: provide a unique name for login.
- Email address: enter the user's email address. Drupal can send registration notifications to this address.
- Password: enter a password for the user or leave this field blank so the user can set it (if the option is enabled).
- User Status:
- Choose whether the user should be activated immediately or remain locked.
- Email notifications:
- Check the box if you want the user to receive a registration confirmation email.
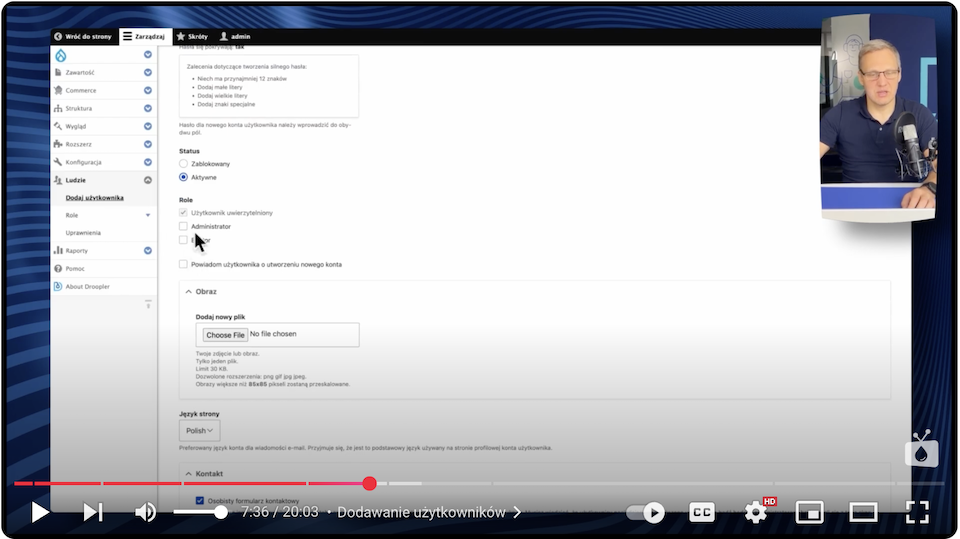
4. Assign a role to a user in Drupal
- In the form, you’ll find a section with user roles.
- Select the appropriate roles to be assigned to the new user, such as:
- Authenticated user - the default role for all logged-in users.
- Editor - a role created earlier for content managers.
- Other roles, depending on the configuration of your website.
5. Save user
- After completing all fields and assigning roles, click the "Save" button.
- The user will be added to the system, and its data will appear in the list of users in the "People" section.
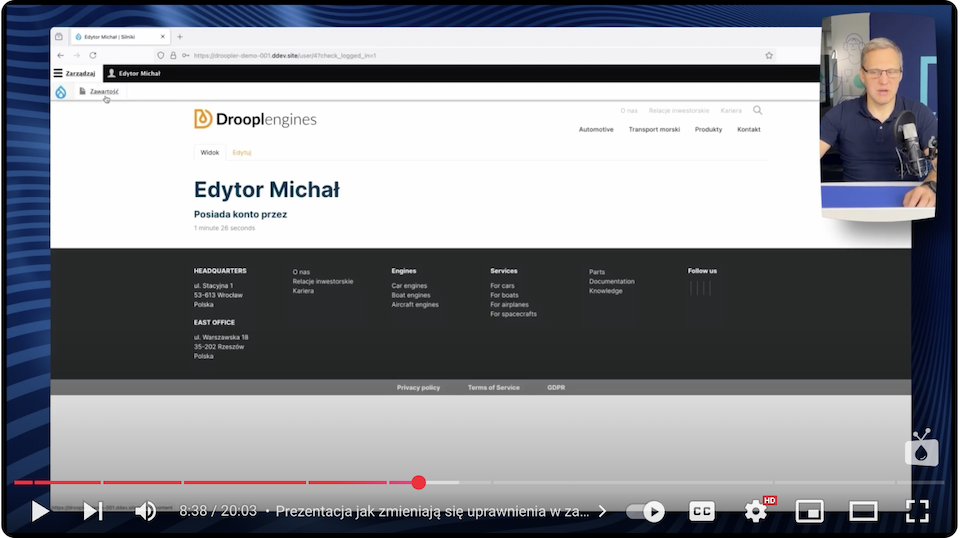
6. Verify that the user has been added correctly
- Return to the "People" section.
- In the list of users, you’ll find a newly added user with assigned roles.
- Make sure all information is entered correctly.
Additional tips:
- User registration through the website: if you enable user registration, visitors will be able to create accounts themselves. In this case, Drupal will automatically assign them the default role of "Authenticated User."
- Manage permissions: if you need to specify what a new user can do, go to the "Permissions" section of the "Roles" tab to configure the details.
Adding a user in Drupal is a quick and intuitive process. With a flexible system of roles and permissions, you can customize his access to resources exactly according to your website's needs.
Granting and revoking privileges in Drupal
The system of granting and revoking permissions to users depends on the roles assigned to them. This allows you to precisely control what individual users can do on the website. Below, you’ll see how this mechanism works and how to grant or revoke permissions in Drupal.
1. Overview of permissions for roles in Drupal
In Drupal, each role is assigned a set of permissions that define what a user can do. Here are some key rules:
- Each action is a separate authorization: for example, adding, editing, or deleting content.
- The more roles assigned to a user, the more permissions they have: permissions from different roles add up, allowing you to create flexible scenarios depending on your organization's needs.
2. Configuring permissions - a practical example
Imagine a situation in which you want:
- Allow editors to manage products on the website, i.e., add and edit.
- Prohibit editors from removing products.
- Authorize editors to "unpublish" the product to make it invisible to users.
(a) Removal of authority to delete content
- Go to the "Permissions" section of the administration panel.
- Find the "Delete any entries" permission under the "Product" category.
- Uncheck this permission for the "Editor" role.
- Save the changes.
Effect: Editors will not be able to remove products either from the content edit or from the content list in the admin panel.
(b) Grant permission to republish content
- In the same "Permissions" section, find the "Content Administration" permission.
- Grant them the role of "Editor."
- Save the changes.
Effect: Editors will be able to mark products as "unpublished." This will ensure that the product disappears from the website's public view but is not deleted. This can be useful in situations where you want to keep content in the archive or prepare it for republishing in the future.
3. Operation of changes in practice
After the changes, user functionality looks as follows:
- Editor: when you click to edit a product, the editor doesn’t see the "Delete" button but has access to the "Published" checkbox. This allows them to mark the product as "unpublished" and save the changes. The product remains available in the admin panel but disappears from public view.
- Anonymous user: a product marked as "unpublished" becomes invisible to the user - it doesn’t appear in product lists or on the detail page.
- Administrator: still has full access to delete, unpublish, and edit all content.
4. Advanced permissions for roles in Drupal
If you want to grant the editor the ability to view unpublished content, you need to install an additional module, such as the mentioned View Unpublished. It authorizes you to assign the "View Any Unpublished Content" permission so the editor can view all content marked as unpublished.
5. Content views vs entitlements
Drupal also allows you to customize content views, making it easier to manage unpublished content:
- Content lists can be configured to display only published content.
- This way, even if the product is in the system but unpublished, it will disappear from all public product lists and views.
6. Flexibility of permissions in Drupal
The permission mechanism in Drupal allows you to create detailed scenarios, such as:
- Restrict access to certain functions (e.g., editing only certain types of content).
- Assign different levels of access to content (e.g., the ability to view only your entries).
- Use permissions that depend on content fields - e.g., hiding the "Price" field for anonymous users.
Example of configuration - prices visible only to distributors
Suppose you want to make product prices visible only to logged-in distributors. You can achieve this in a few steps:
- Install the Field Permissions module.
- Add the "Price" field to the "Product" content type.
- Set permissions for the field - an anonymous user does not see the "Price" field, while a logged-in distributor does.
- A logged-in distributor will be able to view prices, while an anonymous user will only see basic product information.

Advantages of the roles and permissions system in Drupal
The roles and permissions system has many advantages, such as:
- Flexibility: you can customize the permissions system to meet the unique needs of your site, taking into account who has access to the site and the editor.
- Precision: detailed distribution of permissions allows precise control of access to content and functions.
- Scalability: the ability to install additional Drupal modules allows further expansion of the system's capabilities.
Roles and permissions in Drupal for website administrator - summary
Roles and permissions in Drupal are powerful tools that allow you to create complex access management systems. With the ability to create custom roles, assign detailed permissions, and use modules to extend functionality, you can customize Drupal for almost any scenario.
Whether you manage a company website, a news portal, or an online store - properly configured accesses will ensure the security and efficiency of your web page. If you need help setting them up, our specialists from the experienced Drupal agency are here to assist you.