
Multi-Step Form in Drupal - How to Create It in a Simple Way?
Drupal is a powerful tool that gives you many possibilities to create robust web applications. One of the popular modules for this system is Webform, which allows you to work with advanced online forms. In this blog post, I'll show you how to build a multi-step form in just a few easy steps - perfect for registering for events or collecting other submissions. I invite you to read the article or watch the episode of the "Nowoczesny Drupal" series.
What is a multi step form, and why use it?
A multi-step form is a type of form that divides fields into individual steps. This prevents the website visitor from being overwhelmed by the amount of information they have to enter at one time. This translates into a better user experience and a higher number of completed submissions.
Preparing a multi-step form in Drupal
Creating a form in Drupal using the Webform module is very fast and easy. In another article, I showed how to build a job application form on a website. Below, I’ll describe in a few steps how to prepare a multi-step form.
1. Selection of multi-step form template
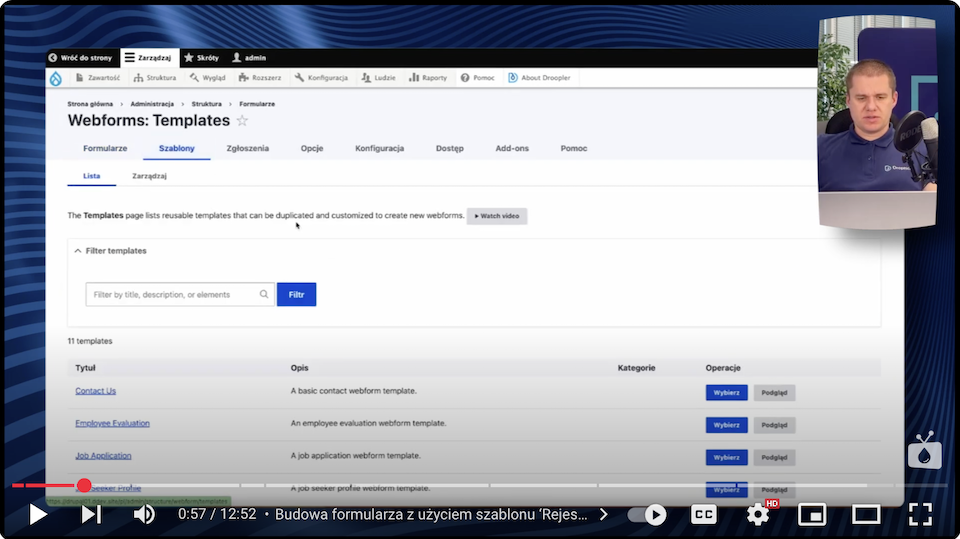
The first stage in building a form is to use a ready-made template. The Webform module offers various options that can be customized to meet the project's needs. In this example, I’m using the "Course Registration" template. After importing it, you’ll get a base form with predefined fields.
2. Adding steps in the expanded form
Then you can focus on building a multi step form.
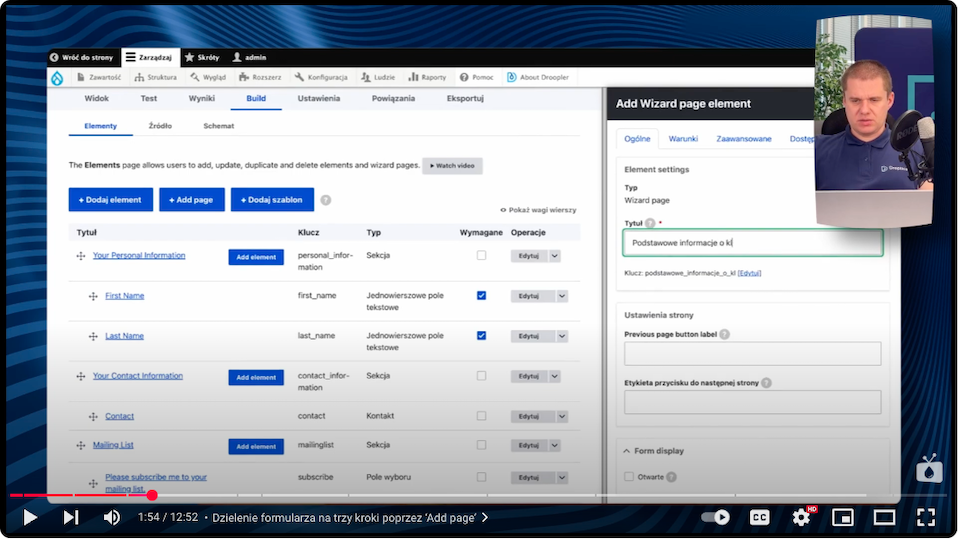
- Go into Build and Add page, which will represent the steps of the form. It will consist of three steps.
- Set the names for the steps, e.g.:
- Step 1: Basic User Information.
- Step 2: Contact Information.
- Step 3: Additional Information.
3. Assigning fields to steps in the multi step form
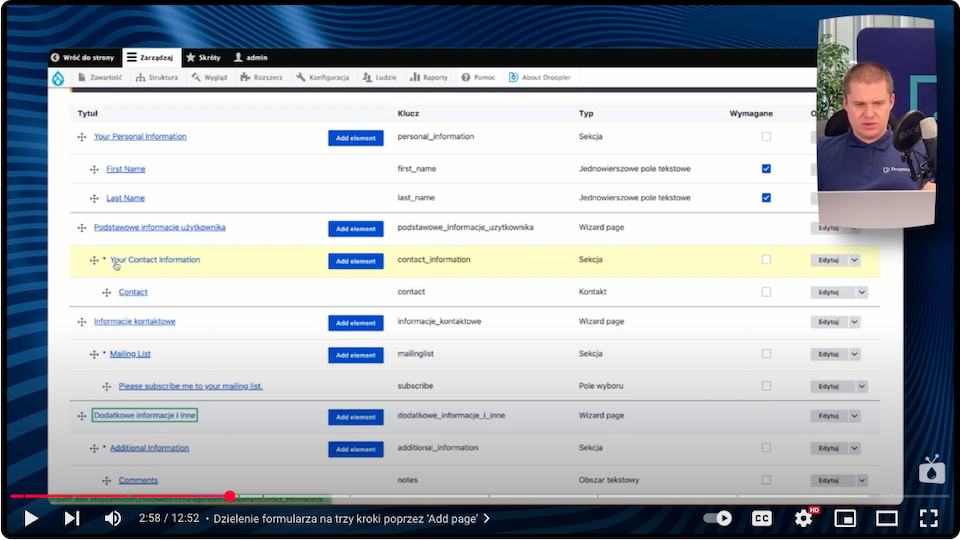
At this stage, organize the questions according to the relevant categories.
- Drag the boxes to the correct pages:
- "Your Personal Information" → "Basic User Information".
- "Mailing List" → "Contact Information".
- "Additional Information" → "Other Information".
4. Adjusting the progress bar
You can customize the appearance of the progress bar to suit your needs.
- In the form settings, enable the progress bar (Progress settings).
- You can choose a style:
- Percentage (e.g., "33% completed").
- Numbered (e.g., "Page 1 of 3").
- In addition, you can enable the option to navigate between steps, which allows the user to conveniently return to earlier sections.
5. Testing a multi step form
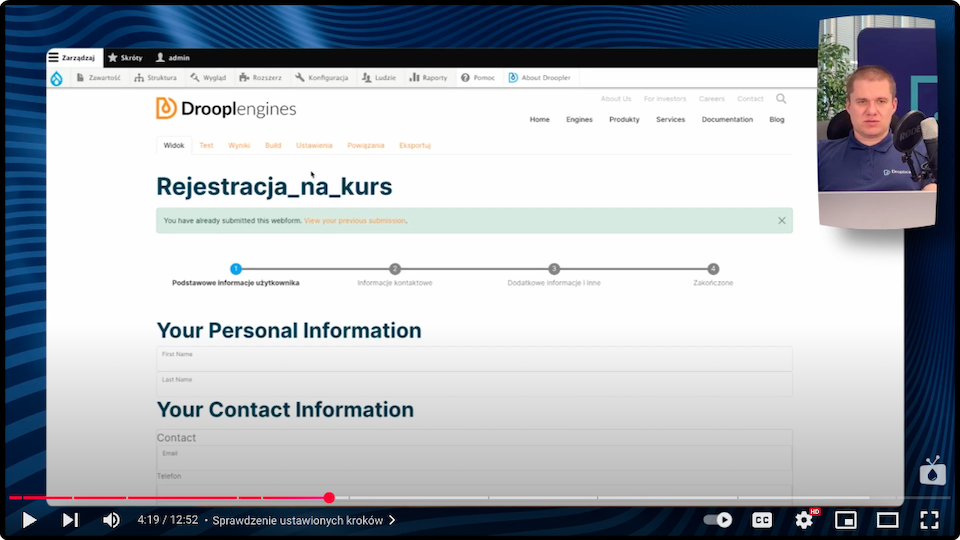
Now you should check your form:
- Go through the online form, filling in the fields in each step.
- Check the correctness of the progress bar and navigation between steps.
6. Form personalization
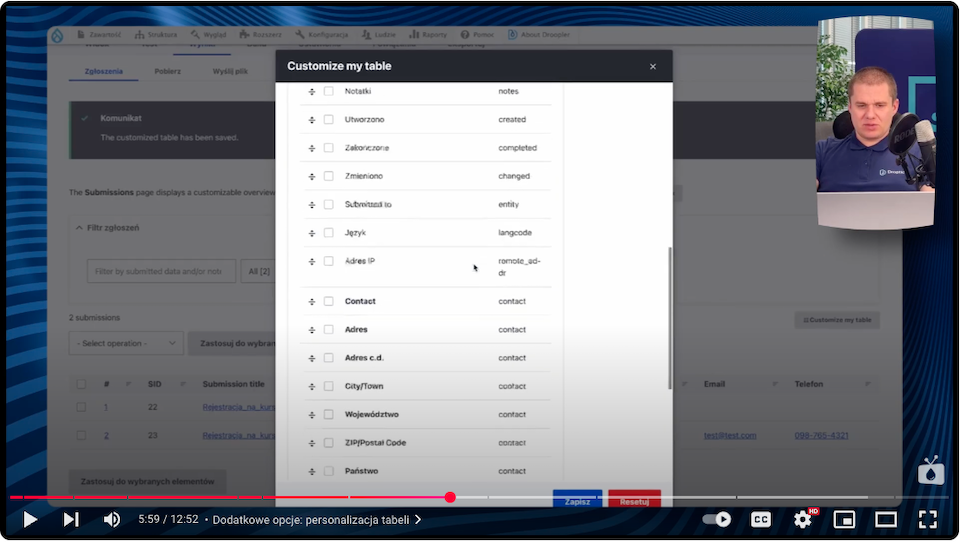
By personalizing the form table in the Webform module in Drupal, you can customize the submissions view to suit your purposes. You can hide unnecessary fields, such as address, and leave only the key ones, such as phone number.
In addition, you have the ability to set different views, allowing each person to tailor the table to their preferences. This feature is especially useful in teams, where various people need different data at a glance.
You can also save a personalized view or set a default one for everyone, providing flexibility and convenience in working with data.
As you can see, creating a multi step form in Drupal with customization option is fast and efficient. With a few simple steps, you can significantly improve the user experience, no matter where you put the form on your website.
Form automation in Drupal
The form automation in Drupal's Webform module allows you to effectively manage requests and user data. With the auto-cleaning feature, you can delete older submissions or data with a certain status, which helps keep the system tidy and minimizes the storage of sensitive information.
If you want to limit the storage of sensitive data:
- Go to Submissions settings.
- Enable automatic cleaning, such as deleting requests that are older than one day.
- Using additional modules for Drupal, you can set data deletion even in minute intervals.
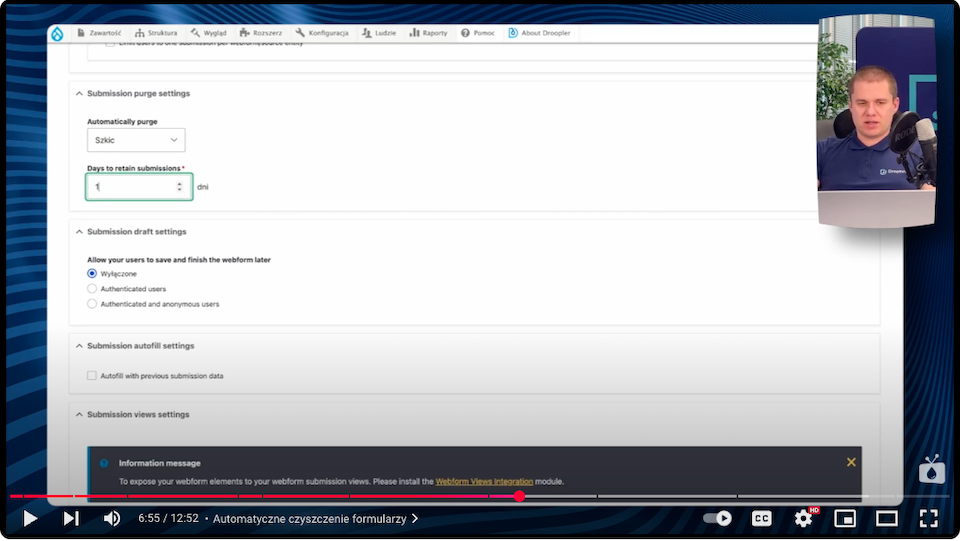
This setup is especially useful when data is sent to external systems, such as email marketing and marketing automation platforms like HubSpot or MailChimp.
Creating multi step form templates
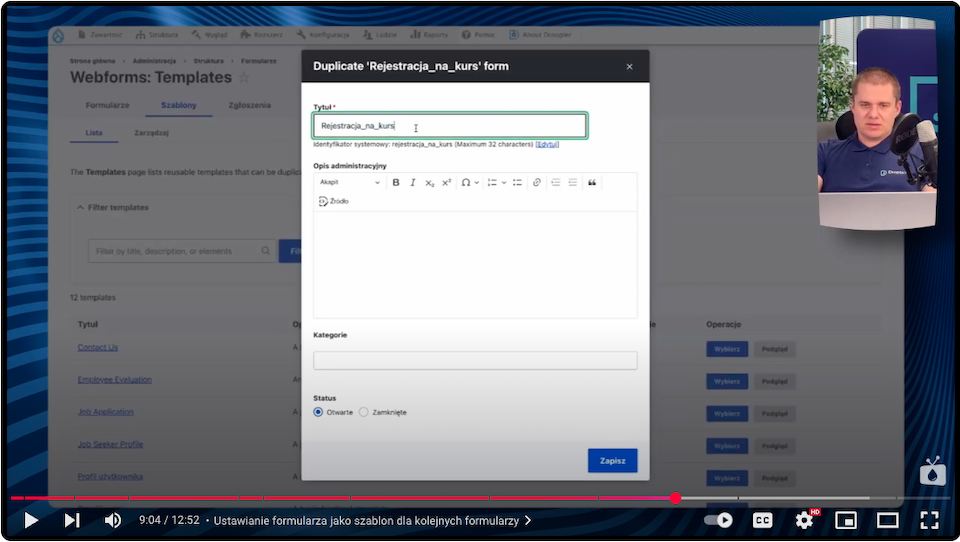
The Webform module allows you to save the ready-made form as a template. This enables you to easily use it in the future for other projects:
- In the settings tab, check the "Use as template" option.
- You can build new forms based on it, modifying fields as needed.
Additional features of the Webform module
- Advanced fields and validation
You can define conditions for displaying fields, use conditional fields, and advanced validation. - Integrations with external tools
Form data can be automatically sent to CRM systems. - Extensive user configuration
Webform allows customization of form and ticket views for individual users. Each team member can define their own settings.
Multi step forms in Drupal - summary
Creating multi step forms in Drupal with the Webform module is simple and intuitive. With ready-made templates, customization options and advanced features, you can quickly adjust the form to meet your organization's goals. It's also worth remembering the automation options, which make it easier to manage your data and keep your system organized.
Drupal and the Webform module are tools that allow you to have full control over your forms while offering convenience of use. However, if you need help configuring them or placing them on your website, get support from experienced Drupal agency specialists.


