
Product Search Engine in Drupal with Apache Solr Integration - How-to Guide
Product search is a key function in e-commerce today. This article will show how to create an advanced product search engine based on Drupal and its integration with Apache Solr. By combining Drupal, Droopler installation profile, and Solr, a powerful tool can be created to make it easier for customers to navigate and search large data sets faster. I encourage you to read the blog post or watch the video in the “Nowoczesny Drupal” series (the video is in Polish).
What is Apache Solr?
Apache Solr is an advanced search system designed for fast processing and searching huge data sets. It’s more efficient than traditional SQL database-based solutions, and its capabilities are especially useful in the context of complex e-commerce sites.
How does it work? It stores information in a way that makes it easy to search and allows you to quickly find data based on complex queries.
Apache Solr enables, among other things, searching specific fields, using special characters, applying logical operators (AND, OR, NOT), auto-complete queries, approximate search (with error tolerance), spell checking, and much more.
What features does Apache Solr offer?
Apache Solr is equipped with several features that make it an extremely versatile search tool. In addition to those mentioned above, the most important ones are:
- Real-time search - provides instant access to results.
- Filtering by fields - allows you to search only selected sections or attributes of products.
- Auto-completion and spell-checking - help users quickly find the products they are looking for, even with typos.
- Grouping of results - Apache Solr can display results grouped by category, making it easier for users to find the products they’re interested in.
Implementing a product search engine in Drupal - choosing an installation profile
Before we start, we need to prepare the environment for easy configuration of Apache Solr.
Installation and configuration of Droopler profile
In our example, we’ll use the Droopler installation profile, which is specially prepared for integration with Apache Solr. Droopler includes ready-made content-type products, so we can build a product search engine without having to manually create and configure each field.
The final result - a ready-made product search engine
Before we get into the step-by-step instructions, let's see what effect we’re aiming for. Once the setup is complete, we will get a ready-made product search engine that allows users to search by letters, categories, tags, and whole phrases. The number of results for each category and tag will also be displayed, helping the user quickly see how many products match the criteria.
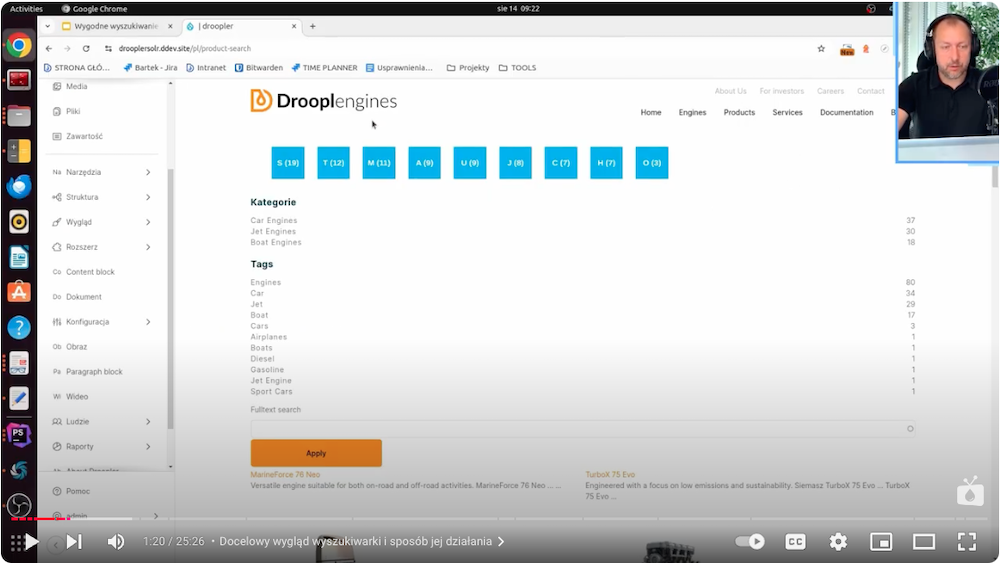
Required modules for Apache Solr integration with Drupal
To connect Drupal with Solr, it’s necessary to install the relevant modules:
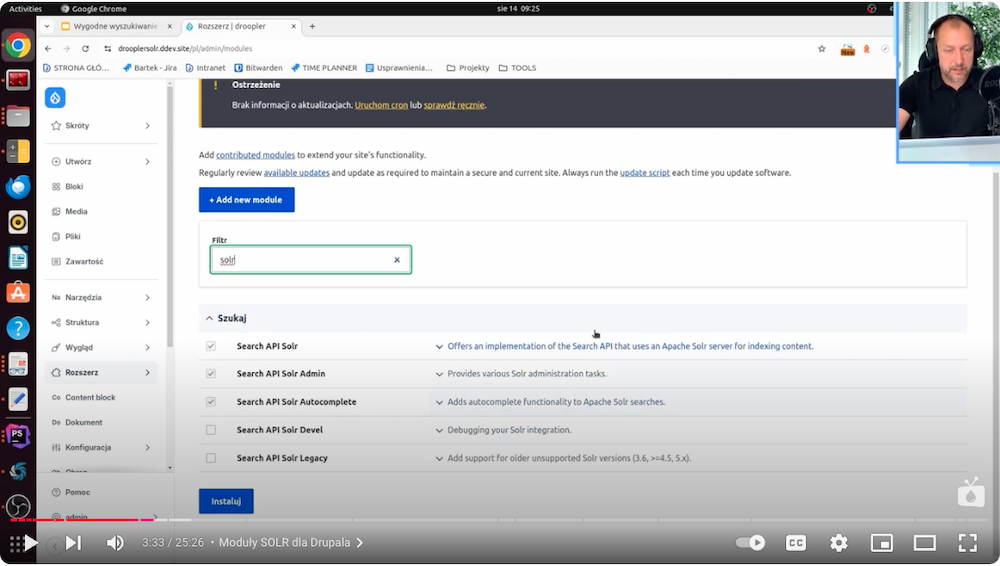
Solr server configuration
The next step is to configure the Solr server in Drupal. Here, we specify the server URL, port, and login credentials, such as username and password, if Solr is secured with BasicAuth protocol.
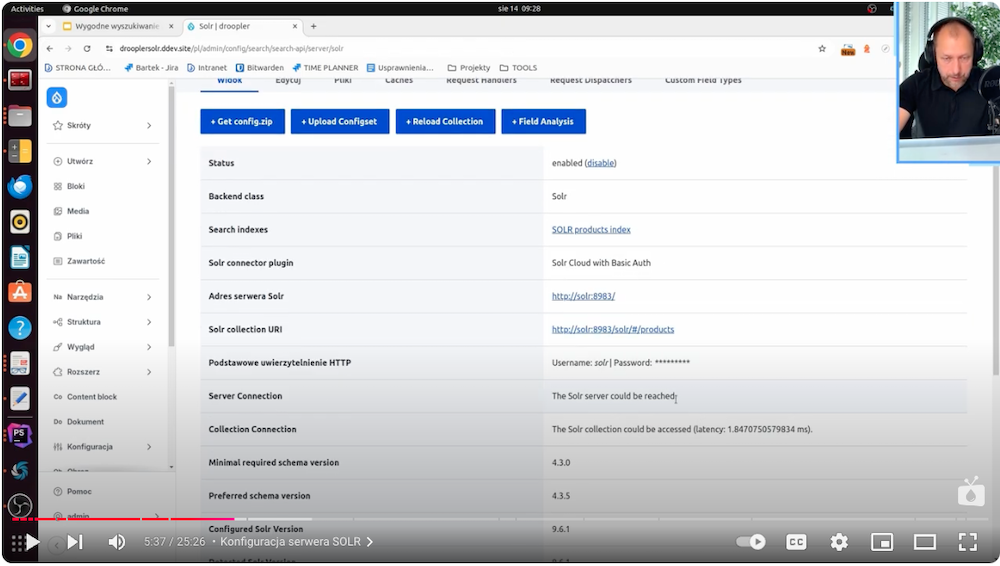
Configuring indexes in Drupal
An index in Drupal is a structure that stores the data we want to search.
We add the new index in Search API. Then, we can take care of the configuration:
- We name the index (for example, "Products Index").
- We specify the types of content we want to index, such as products, articles, or pages (in our case, we may choose "products" if the index is for product search).
- We choose the server: in the index settings, we choose the Apache Solr server we previously configured as the indexing source (this will allow Drupal to send data to Solr, which will do the processing).
- We configure fields for indexing: to add a new field, click "Add Field" and select the appropriate fields from the list. Fields such as "title" or "description" will be useful for full-text search, while "categories" and "tags" can be used as filters.
- We customize the field settings: we specify which fields will be included in the index and how they’ll be searched. For example, we can choose to make the text fields (title, description) full-text searchable, which will allow searching by phrases.
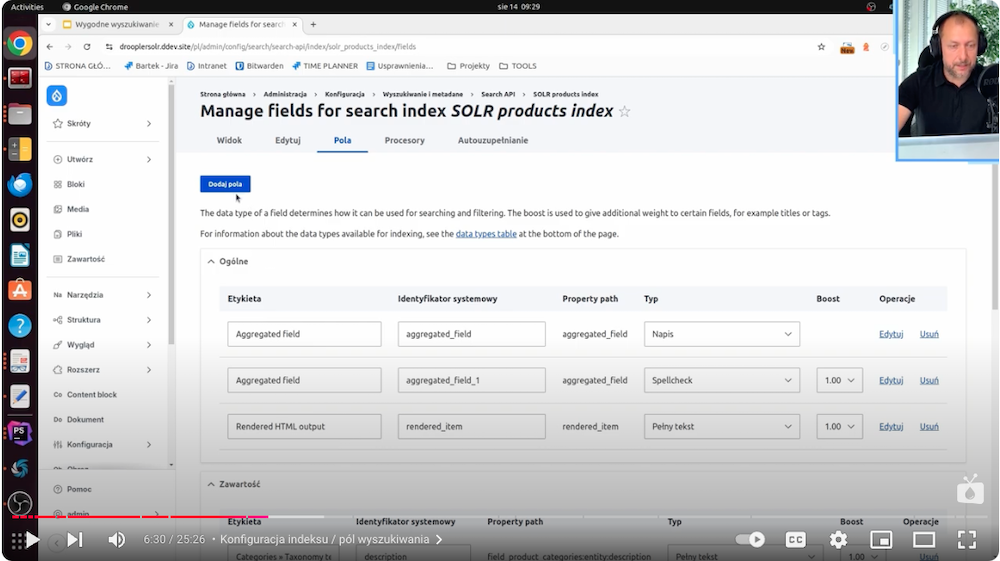
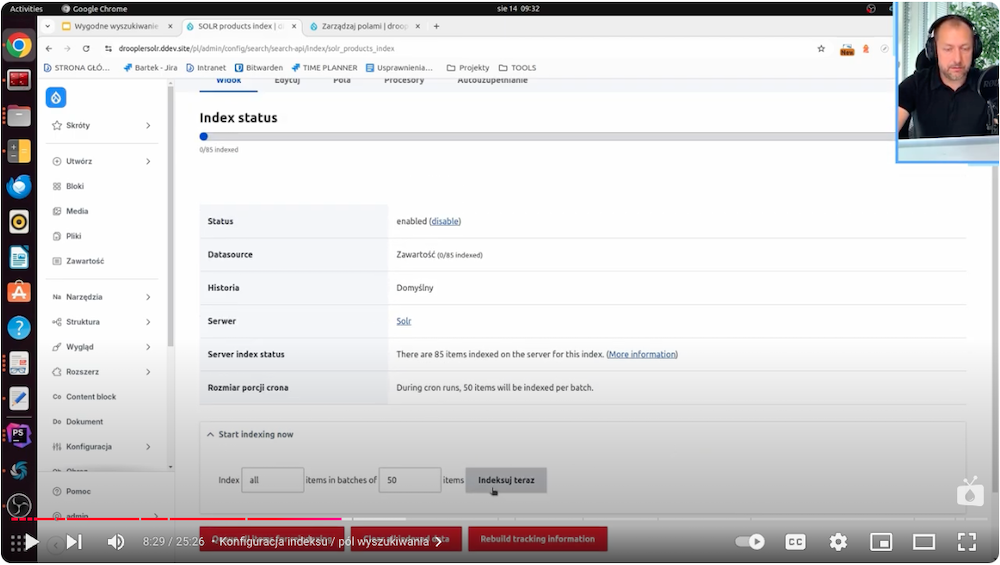
Once the index is configured, we perform reindexing to ensure that all data is available for Solr.
To accomplish this:
- We move to the Search API tab: in the Drupal admin panel, we open the Search API section, where we can see a list of all configured indexes.
- Select the index to be reindexed: find and select the index containing the data to be reindexed (e.g., "Product Index").
- We review the index settings:
- We verify that the fields for indexing are properly configured and include all items to be available for search.
- We verify that the Solr server is selected to ensure correct integration.
- We add the content to the reindex queue:
- Click the "Queue items for reindexing" option.
- We start the reindexing process: start reindexing by clicking "Index now" or "Use cron function" so that the system automatically starts processing all items.
- We monitor the process: watch how the data is indexed and pay attention to the number of items processed. The process can take a while, especially with large amounts of data.
- We check the status of the index: once the reindexing is complete, we verify that all items have been correctly indexed and are ready for search.
Creating a product search engine view
Now, we'll look at creating a convenient view of our product search engine.
Building a new view
In Drupal, the view allows you to present indexed data in a user-friendly way. We configure the new view as follows:
- We add a view: under Structure > Views, we click "Add new view" and give it a name, e.g., "Product Search." We select a Solr index, e.g., "Product Index" as the data source.
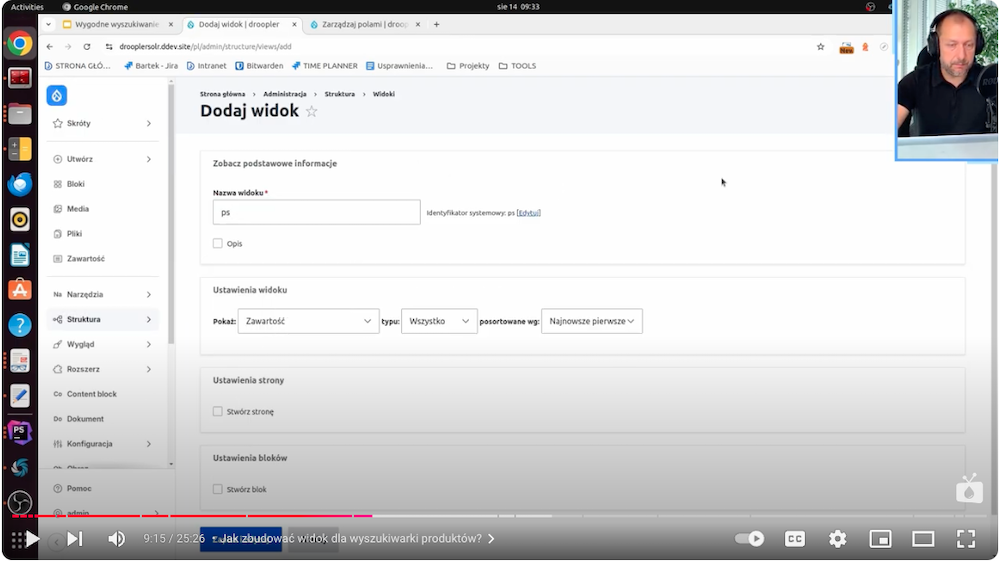
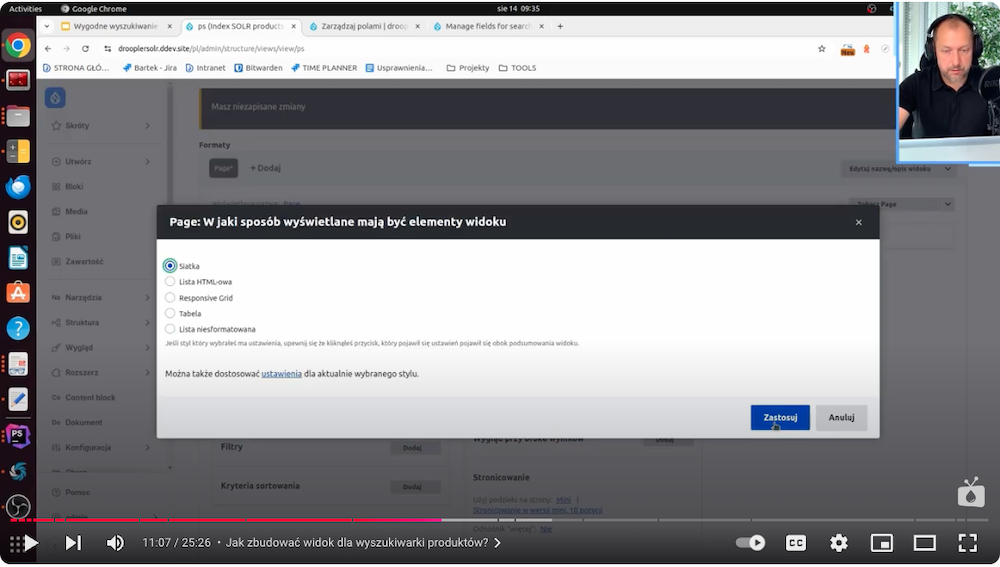
- We set the display: we specify how the results we want to be presented (list or grid) and the number of results per page.
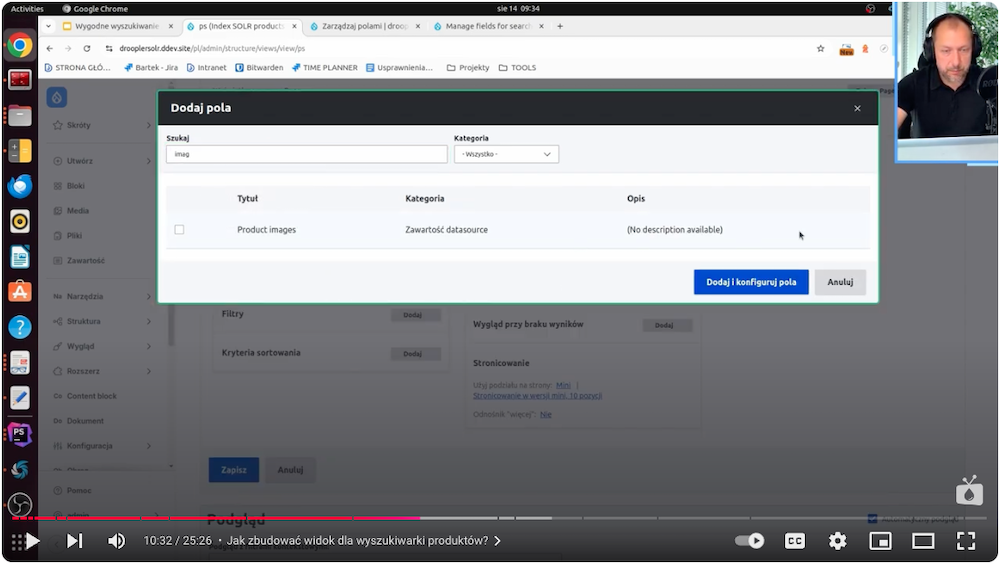
- We add fields: we select fields to display (e.g., title, description, miniature, category). For images, we set a miniature with appropriate dimensions.
- Add filters: add a full-text filter for keyword searches and additional filters, such as by categories and tags.
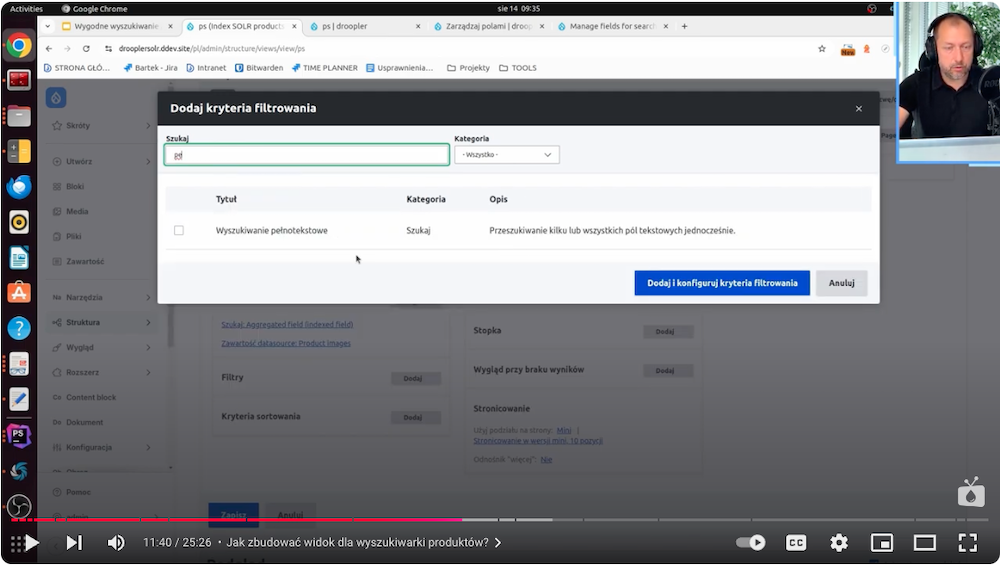
- Keyword highlighting and autocomplete: we’ll cover this step in detail later in the article.
- Save and test the view: save the settings, test the search, and verify that all filters and functions work correctly.
Filters and keyword highlighting
We add filtering features, such as full-text search and the ability to highlight keywords (called highlighting). We click "add filter" and select the full-text search filter, then configure it to search the most important fields, such as title and description.
In the next step, we add additional filters after fields, such as categories and tags, which will allow us to narrow down the search results. Now we add keyword highlighting: go to the "Processors" tab and enable "Highlight" for selected fields, such as title and description.
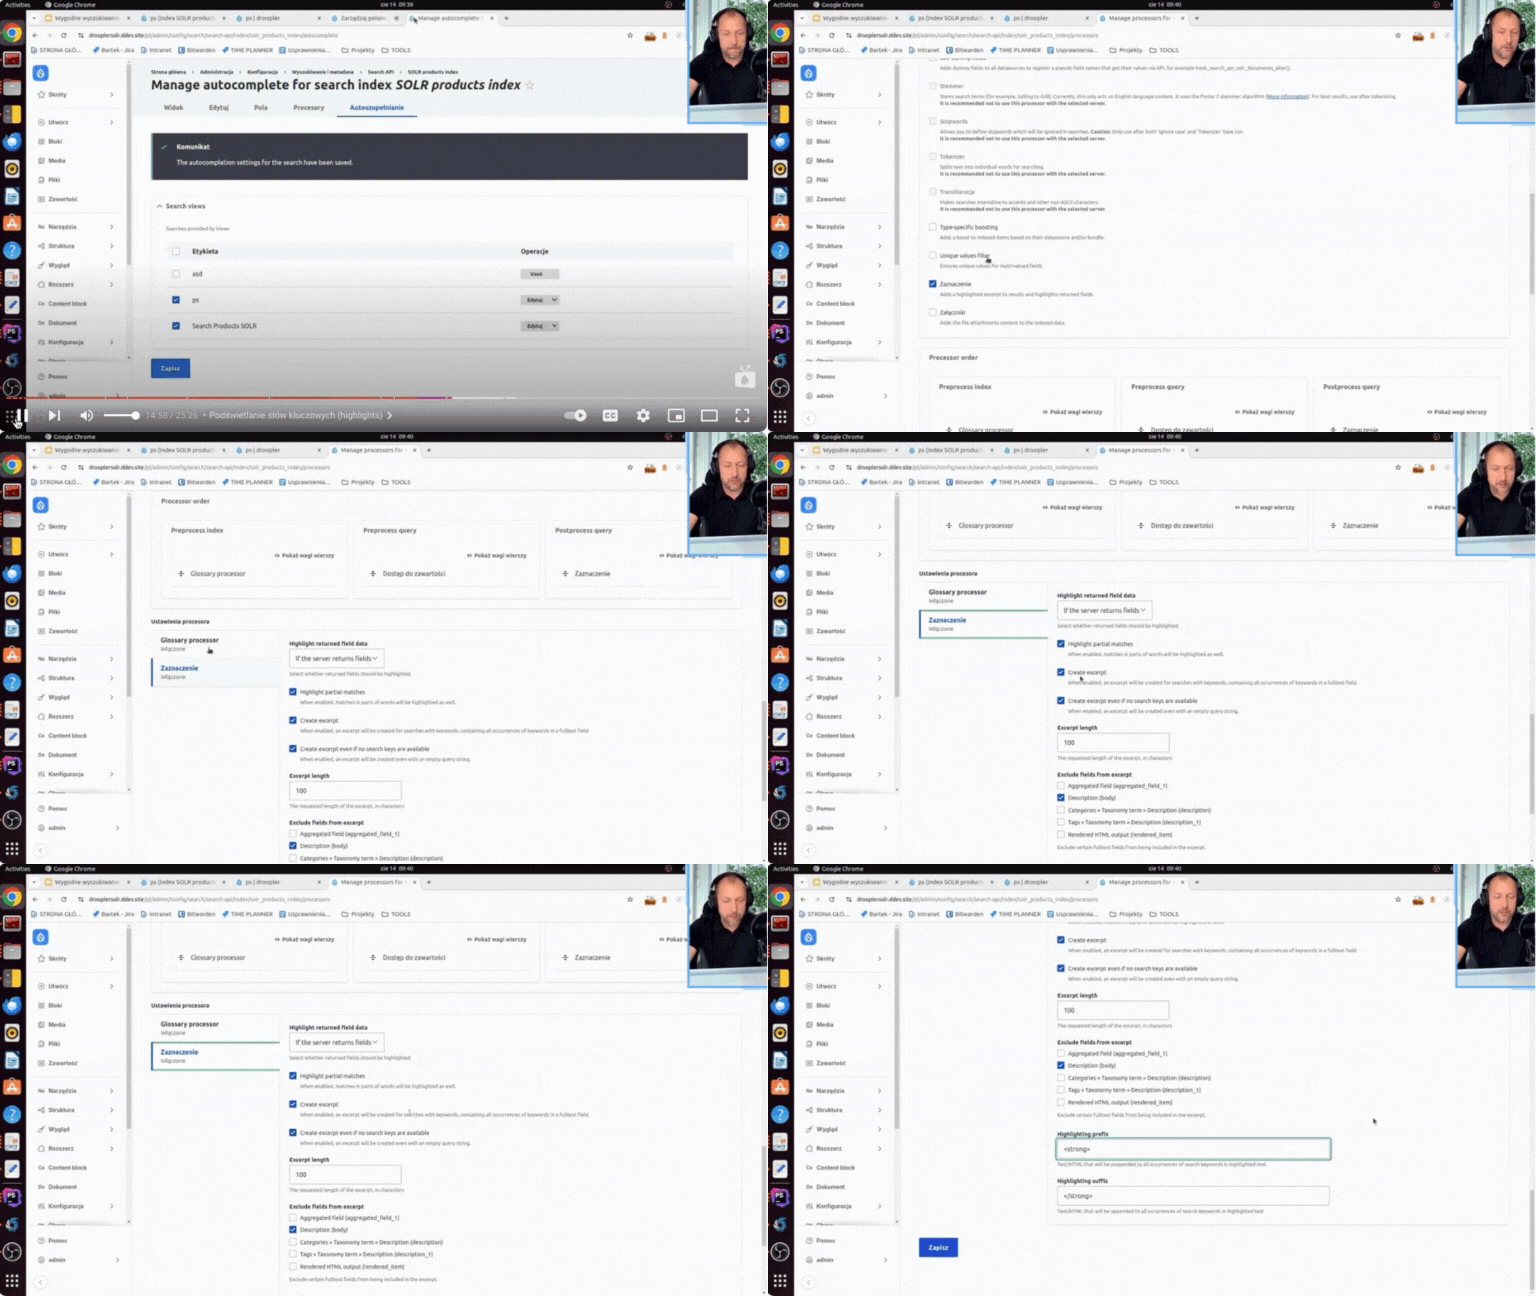
With this feature, search terms will be highlighted, making it easier for the user to understand why a particular product appeared in the results.
Advanced product search engine features
Below, we’ll examine and discuss the features that can be added to our product search engine. They enable advanced searches and are very convenient for the user.
Autocomplete function and spelling correction (Spell Check)
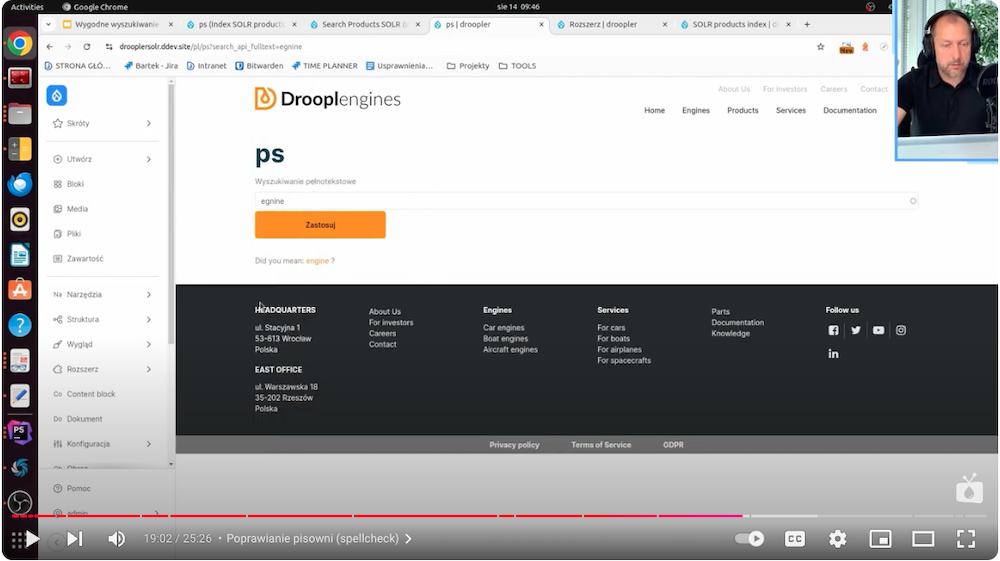
Solr also gives you advanced features such as autocomplete, which allows you to display prompts while typing a password, which is implemented by the Solr Autocomplete module. The Spell Check module, meanwhile, helps a user who has made a typo by suggesting alternative keywords.
To apply both functions, you need to:
- Enable the Autocomplete module:
- In Drupal, activate the Solr Autocomplete module. Then, in the Solr index settings, click on the "Auto-complete" tab and enable it for the selected view, such as "Product Search."
- In the options, you can customize the display of results so that users get suggestions when typing queries.
- Add Spell Check module to correct spelling:
- Activate the Spell Check module. Next, add a new text field in the index, such as "Aggregated Fields," which will handle spelling correction for fields such as "title" and "description."
- Enable the Spell Check function in the index settings, allowing the display of correct suggestions in case of typos.
After saving the changes, perform reindexing again. Autocomplete and spelling correction will be active, supporting more convenient searches.
Search by categories and tags
With the Facets module, it’s possible to search products by categories and tags. Facets creates blocks that can be placed in various places on the page, making it easy for users to filter results based on the categories or tags they’re interested in.
Configuration of Facets
We configure Facets by enabling them in Drupal. Then, we go to the module settings and select the view for which we want to add facets (in our case, the "ps" view).
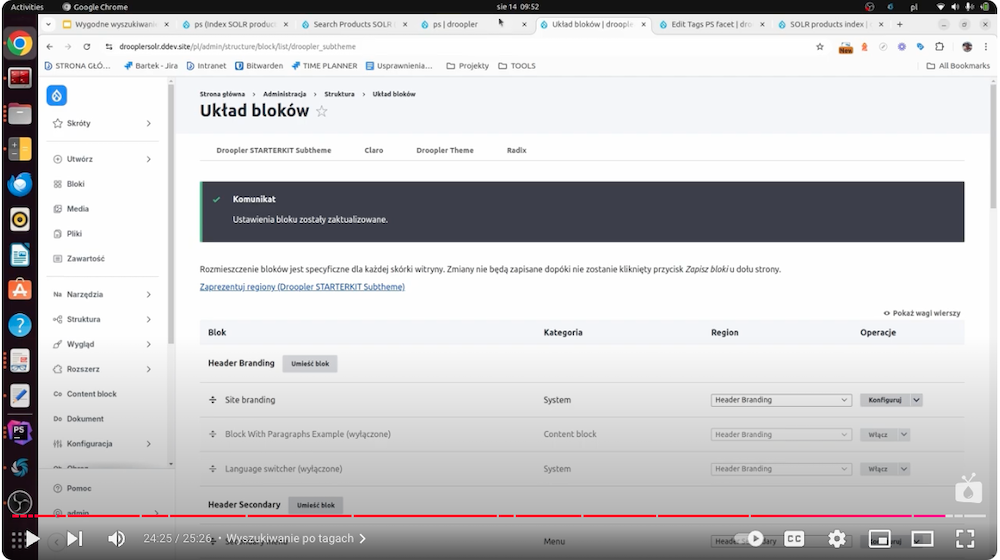
We click "Add Facet" ("Add Facets") and select the field by which we want to enable filtering, such as "Categories" or "Tags." We set the name of the facet and the display options (e.g., as a list of links) and enable the "Show number of results" option so that users can see the number of products in each category. Finally, we go to "Block Layout" ("Block Layout") and place the newly created Facets blocks in a selected region of the page, such as a side column, so that they are visible in the search view.
Product search engine with Apache Solr integration - summary
Integrating Drupal with Apache Solr using a Droopler profile allows you to create a powerful and user-friendly product search engine. Features such as keyword highlighting, autocomplete, spelling correction, and the ability to filter by categories and tags make searching your site quick and intuitive. Creating such a tool requires appropriate modules, but the final result is worth the effort, offering users a modern and advanced product search engine. If you need support in this or a similar task, experts from our Drupal agency will help you perform this kind of configuration.


